Learn how to integrate Mautic 5 and Amazon SES to send emails at scale.
After almost two years, the team at Mautic has released one of the biggest updates to the marketing automation platform to date. With support for PHP 8.1 and migrating to the Symfony 5 framework, many things need updating as well. One of the things that we will touch on in this article today is changing the configuration to configure Mautic 5 and Amazon SES for fast and scalable email sending.
Mautic 5 and Amazon SES configuration
From now on, instead of configuring emails in the old form where you are entering your SES credentials, Mautic now uses Symfony’s DSN (Data Source Name) format and their Mailer package.
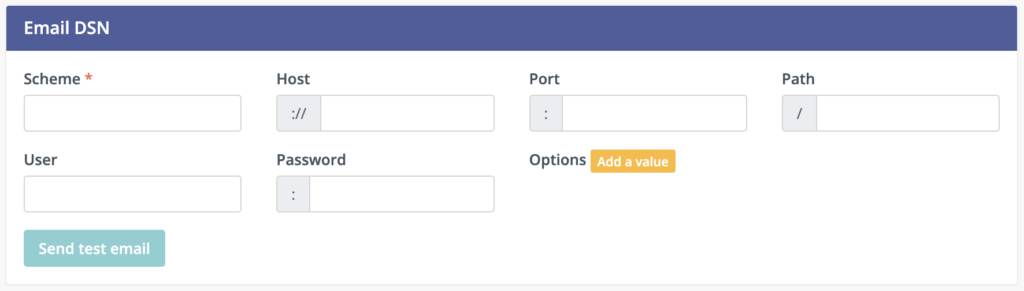
Mautic 5 Email configuration
Before configuring the settings, we need to install symfony/amazon-mailer package that will allow us to communicate with Amazon SES API.
Go to your terminal and connect to your Mautic server. Next, navigate to your Mautic installation and run this command:
composer require symfony/amazon-mailer
This package will allow us to set up the DSN in configuration to ses+api scheme needed for sending emails.
After that, we can go back to Mautic configuration and configure Email DSN as follows:
Scheme: ses+api
Host: default
Port: leave blank
Path: leave blank
User: ACCESS_TOKEN (from your SES credentials)
Password: SECRET (from your SES credentials)
Options: click Add a value
Label: region
Value: us-east-1 (the SES region you are using)
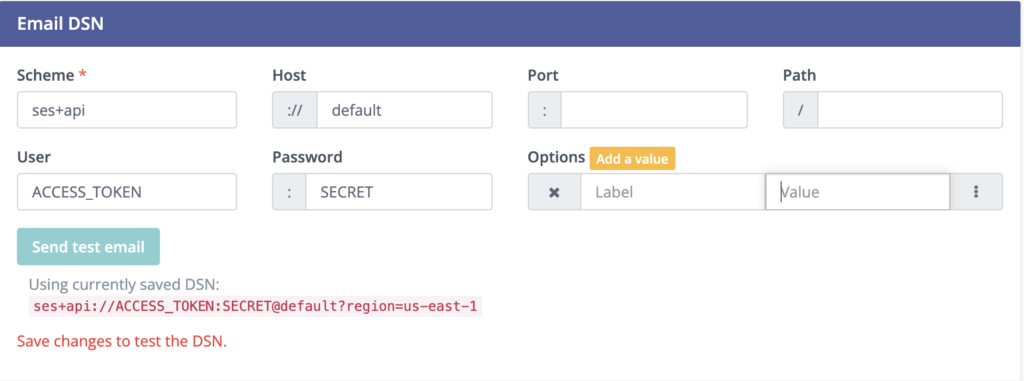
In the end, you will have the form looking like this
Mautic 5 Amazon SES configuration
Mautic will send the emails via SES using immediate delivery as it’s the default way of sending messages. If you plan on sending a higher volume of emails, it’s better to use the queuing mechanisms that are designed to handle those workloads. Our personal favorite is using Redis as queueing mechanism. This feature was long awaited in Mautic and starting with version 5 that relies on Symfony 5 framework, we can finally use wide variety of queues, including Redis and even Amazon SQS.
Redis configuration
If you haven’t already, you can read an in-depth article about how to configure Mautic and Redis.
Now, we will assume you already have a Redis server, either as a service on your server or as a separate instance. The configuration is easy. Once again, we are going to use DSN to configure the Email and SMS queue.
Install the symfony/redis-messenger package.
composer require symfony/redis-messenger
Then, in Mautic configuration, go to the Queue Settings and look for the first form, Queue for email (SMS and push messages).
Here you have to define at least three settings in case you are using the default Redis installation:
Scheme: redis
Host: 127.0.0.1 (or the IP address of your Redis instance)
Port: 6379
Hit save and close and you are good to go.
UPDATE
From now on, Mautic is utilizing the workers from Symfony, meaning that you don’t have to set up a cron job to send emails. In fact, you might end up overloading the server since every minute you will spawn a new service for picking up emails from the queue and processing them. So instead of creating new cron, ignore this and set up a daemon on your server.
Lastly, you need to update your cronjobs to enable sending emails.
Using Supervisor to Send emails with Mautic 5 and Amazon SES
For running our workers in the background, we will utilize the supervisor. It’s a program that allows us to spawn processes in the background and ensure that they are running if they are terminated. This allows us to have an always running worker that will check for new emails in the queue and send them.
Here we will cover installing and configuring supervisor on Ubuntu 22.04.
First, connect to your server via SSH and run following command:
sudo apt update && sudo apt install supervisor
After the installation is completed, the service should run automatically. You can verify that by running the command:
sudo systemctl status supervisor
Check for the following output:
systemctl status supervisor
● supervisor.service - Supervisor process control system for UNIX
     Loaded: loaded (/lib/systemd/system/supervisor.service; enabled; vendor preset: enabled)
     Active: active (running) since Sat 2024-01-13 20:24:30 UTC; 39min ago
       Docs: http://supervisord.org
   Main PID: 807 (supervisord)
      Tasks: 14 (limit: 4556)
     Memory: 718.9M
After the installation, we can move and configure our daemon.
We are spawning the new workers by creating the config file in the supervisor.
sudo nano /etc/supervisor/conf.d/mautic-mail.conf
Next, paste and adjust the following code to match your Mautic installation:
program: mautic-mail is simply the unique name of your daemon. You can set it to anything you’d like
directory tells us where your Mautic installation is located
command – this is the actual command. If you have multiple PHP versions installed on your server, you can use the alias for the version you are using (php8.1, php8.0, or leave php if it’s the correct version)
autostart and autorestart directives allow us to restart the process in case it’s stopped.
user is the actual user under which your mautic instance is running. By default, it’s www-data
After updating the config file with your settings, save the file and exit the editor. Next, we will instruct the supervisor to check for new config files.
sudo supervisorctl reread
If everything is okay, you should see the following output:
Output
mautic-mail: available
After seeing the correct output, we can update the supervisor to run our worker.
sudo supervisorctl update
And once again, if everything is okay, we will see the following output;
Output
mautic-mail: added process group
To verify that the worker is running, we can enter the supervisor by running supervisorctl in your terminal.
sudo supervisorctl
Right after the launch, supervisor will list the running processes:
Hi there, welcome the third part of building your open-source marketing automation stack. In this part, In this article, we will configure our instance for sending emails using Amazon SES (Simple Email Service). However, sending emails is not all we need to set up for proper usage. You must have proper bounce and complaints management as well. Mautic provides you with several options, but in our case, two are available. You can either use a Monitored inbox feature or Amazon Simple Notification Service, which will send information directly to Mautic, making the setup cleaner and easier to use.
I will use the second option, managing bounce and complaint management via Amazon SNS. It requires a few extra steps but once configured, you won’t have to worry about bounces and your inbox won’t be flooded with Amazon emails. So, are you ready? Let’s get started 🙂
In this article we will go through 4 steps:
Verifying domain on Amazon
Verifying email address on Amazon
Creating SMTP Credentials
Configuring Mautic to send emails
First you need to sign up for your Amazon AWS Account. Go to the https://aws.amazon.com/ and click Create an AWS Account. Once you are done, login to your account and search for Simple Email Service. To enable email sending via Amazon, you need to do couple of things:
Verify the domain that you will be sending from
Verify the email address that you will use to send your emails
Domain verifications is done using your DNS providers while email verification is based on confirming the address by receiving the email from Amazon to your inbox.
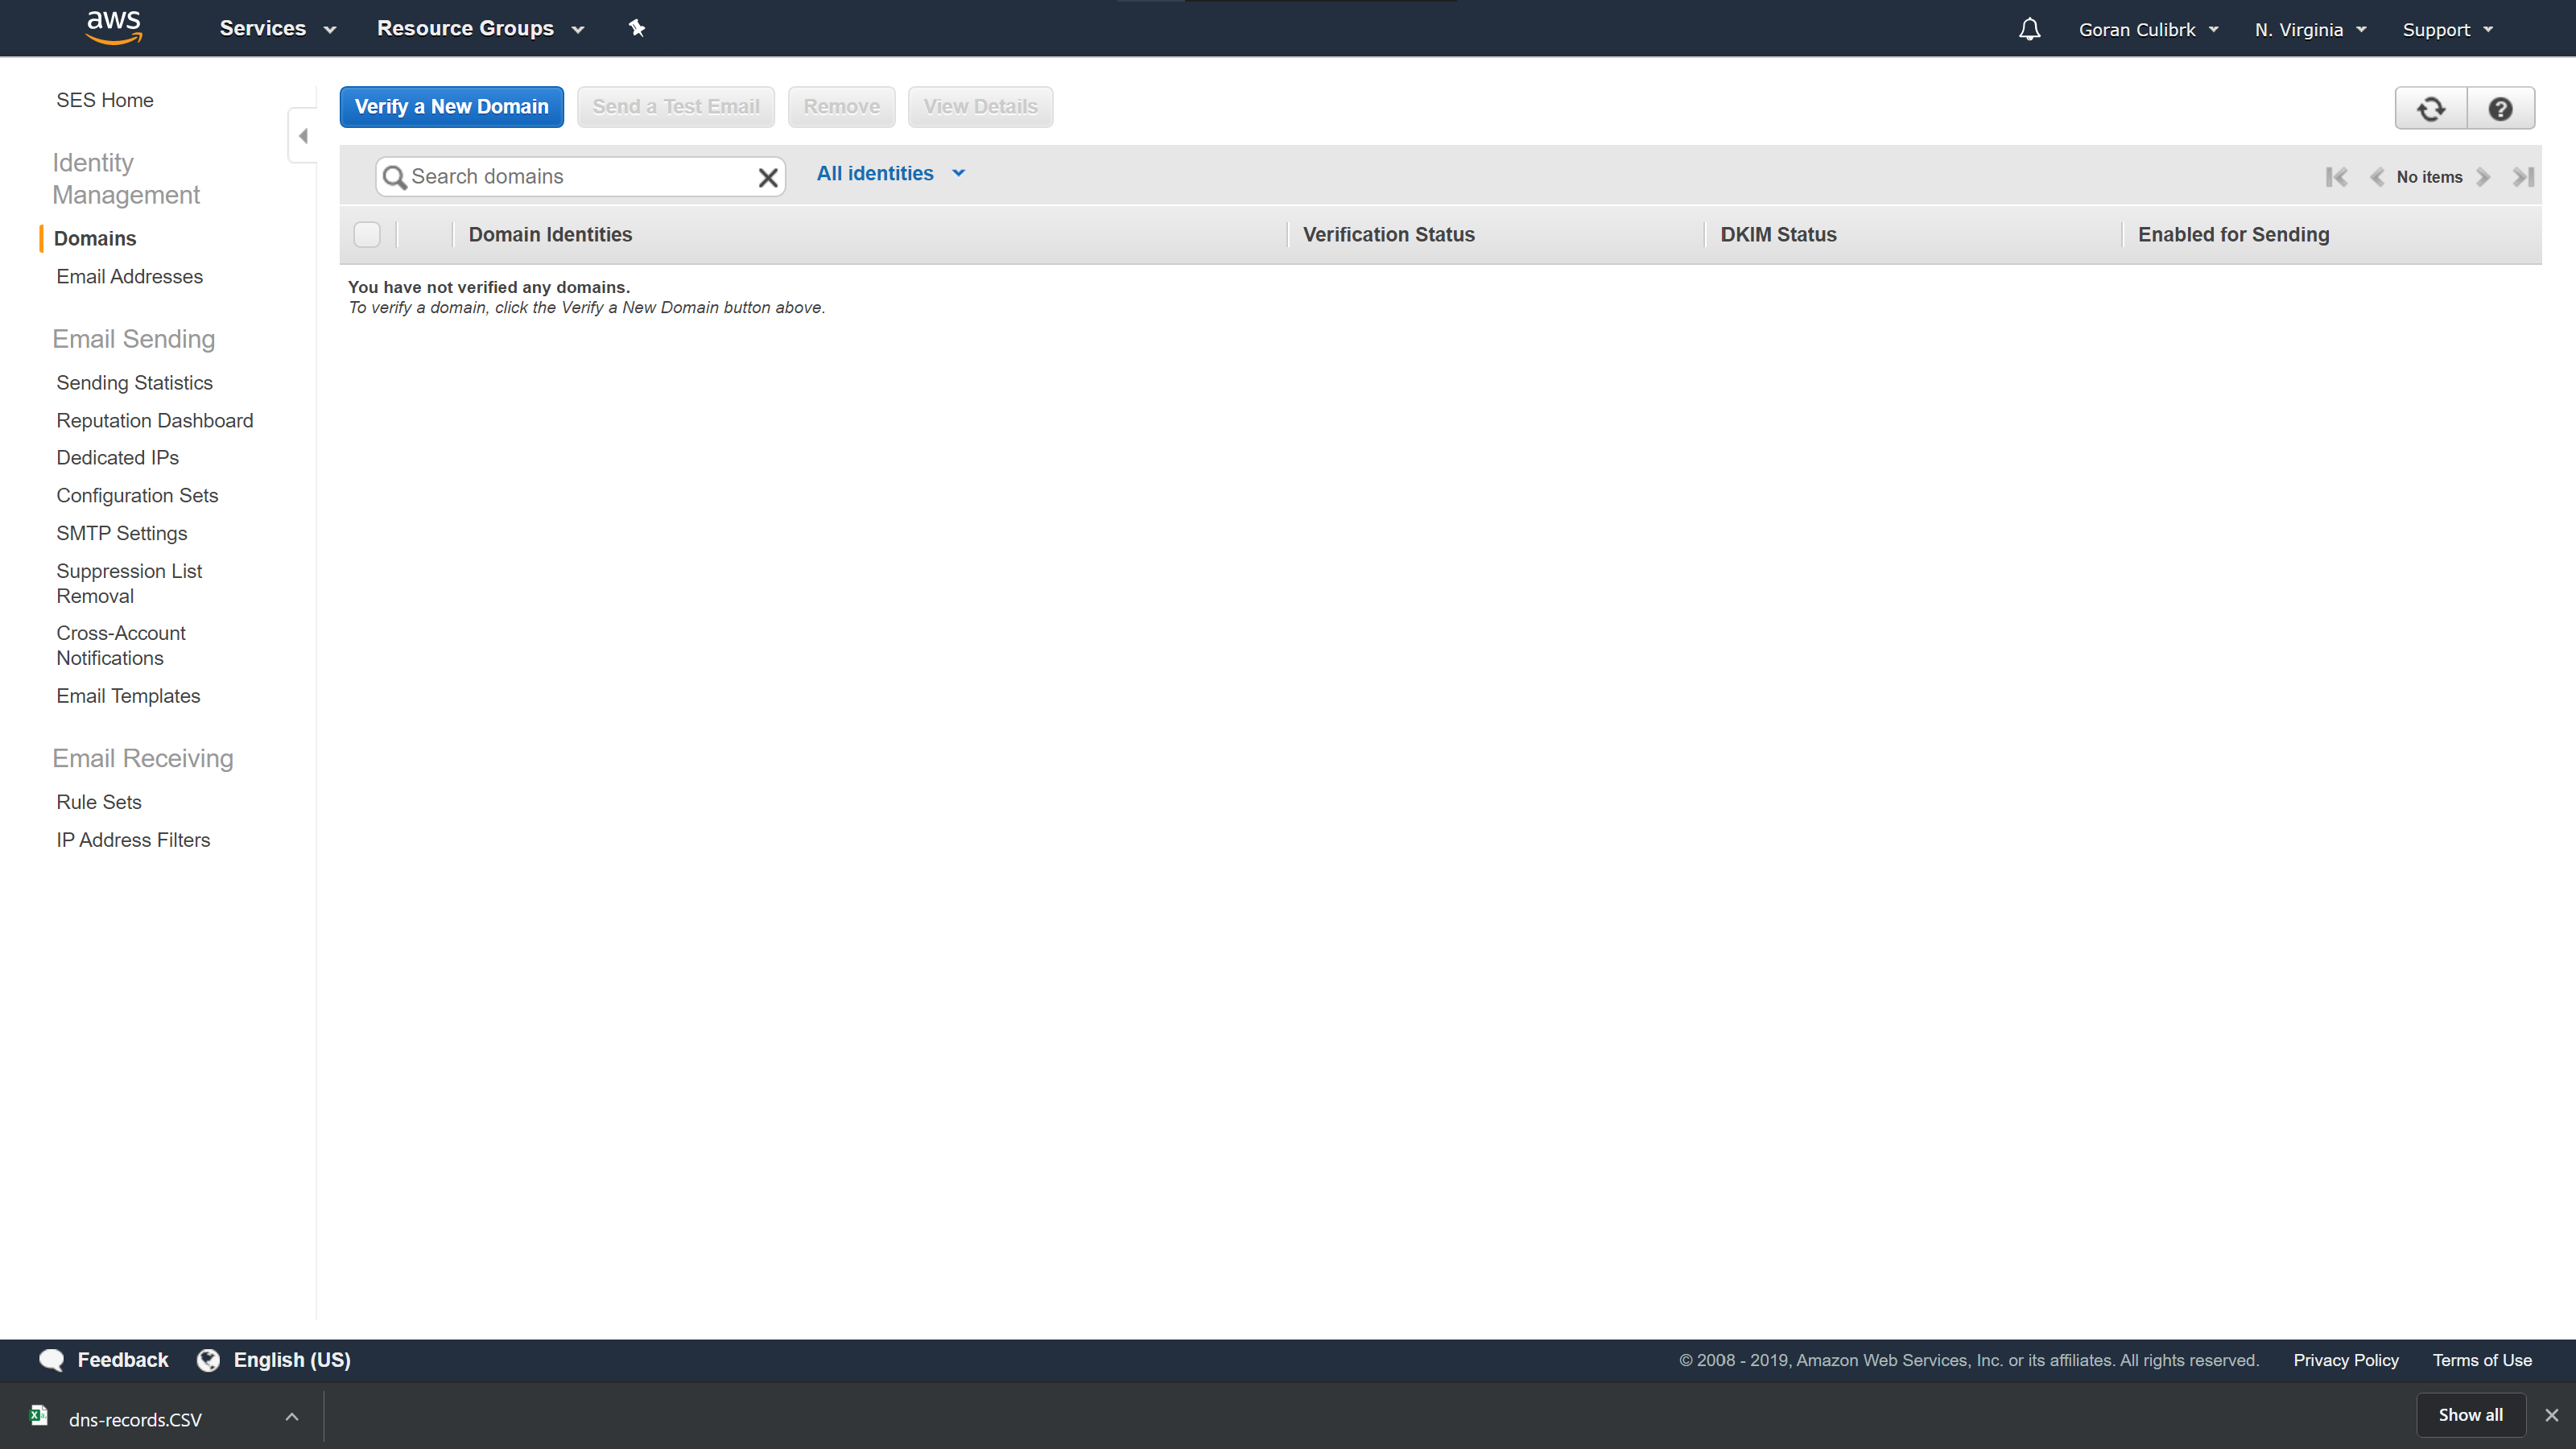
Let’s dive in. Step 1 is going to the Domains page and clicking Verify a New Domain button.
Adding new domain
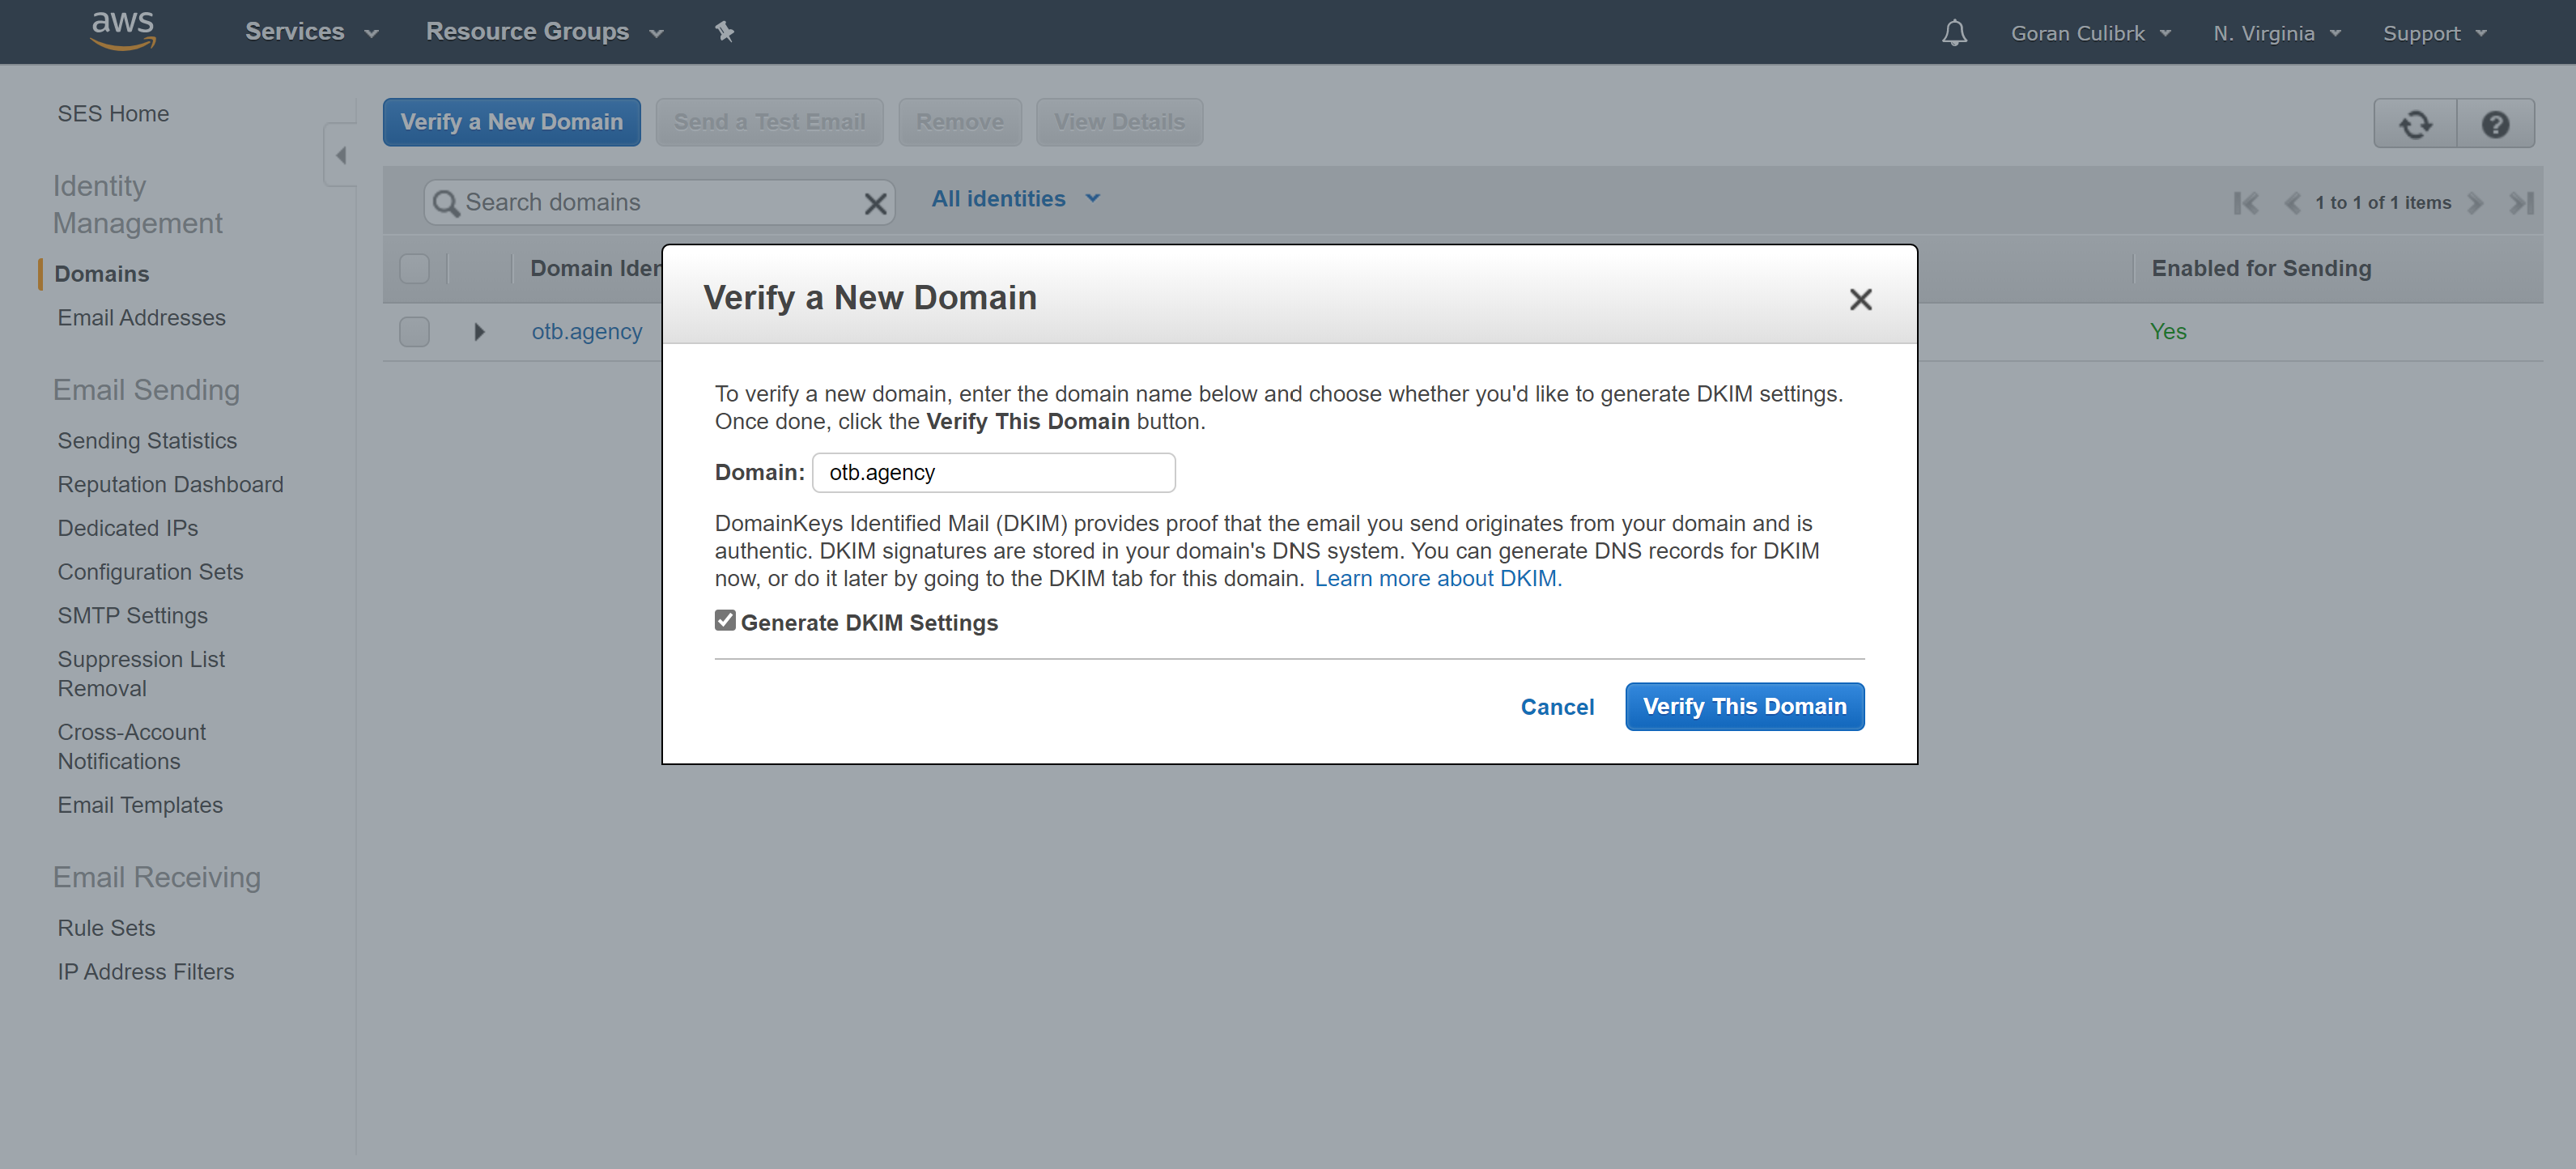
Enter your domain name, check Generate DKIM Settings that will ensure that emails you send from Mautic are originating from your domain and that they are authentic so you will avoid hitting the spam.
Enter your domain
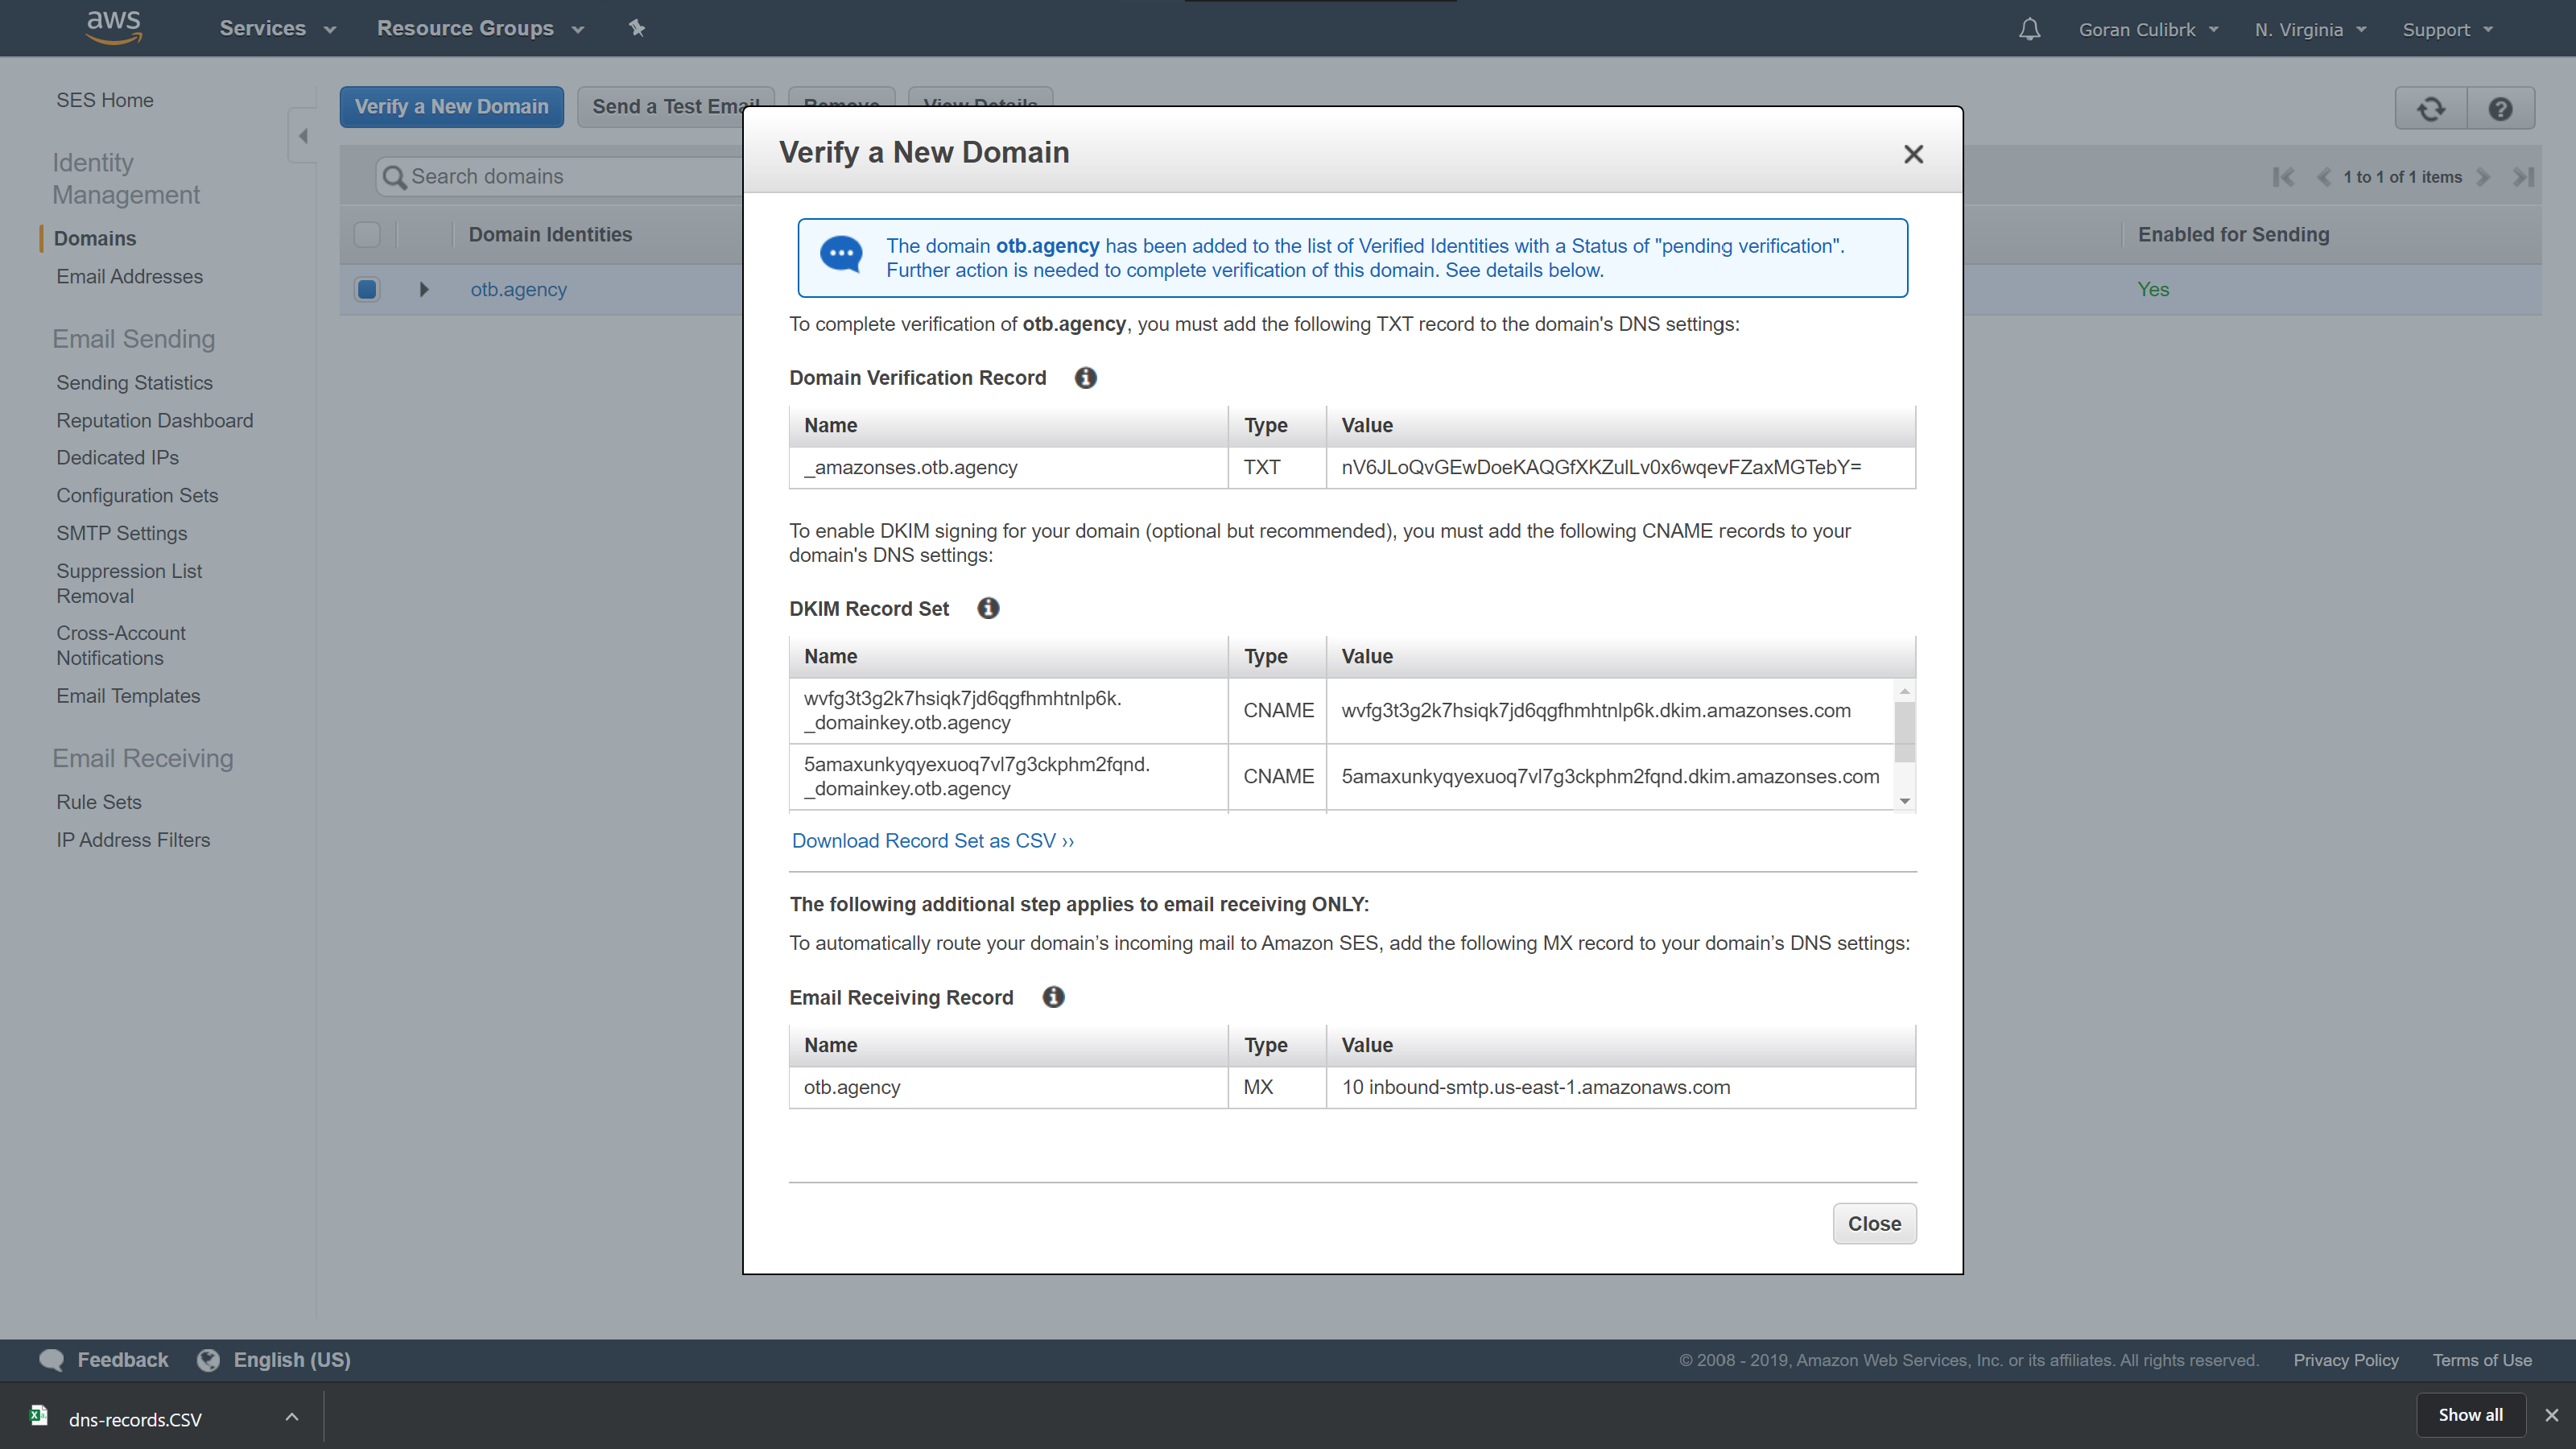
Once you click Verify This Domain you will get a list of DNS records that you need to add in your domain management control panel. These settings will provide Amazon with permissions necessary to send email under your domain. Since we are not using email receiving, you can ignore the last setting which allows Amazon to act as email server and allows it to receive emails in your name. Skip that part.
DNS settings required for domain verification
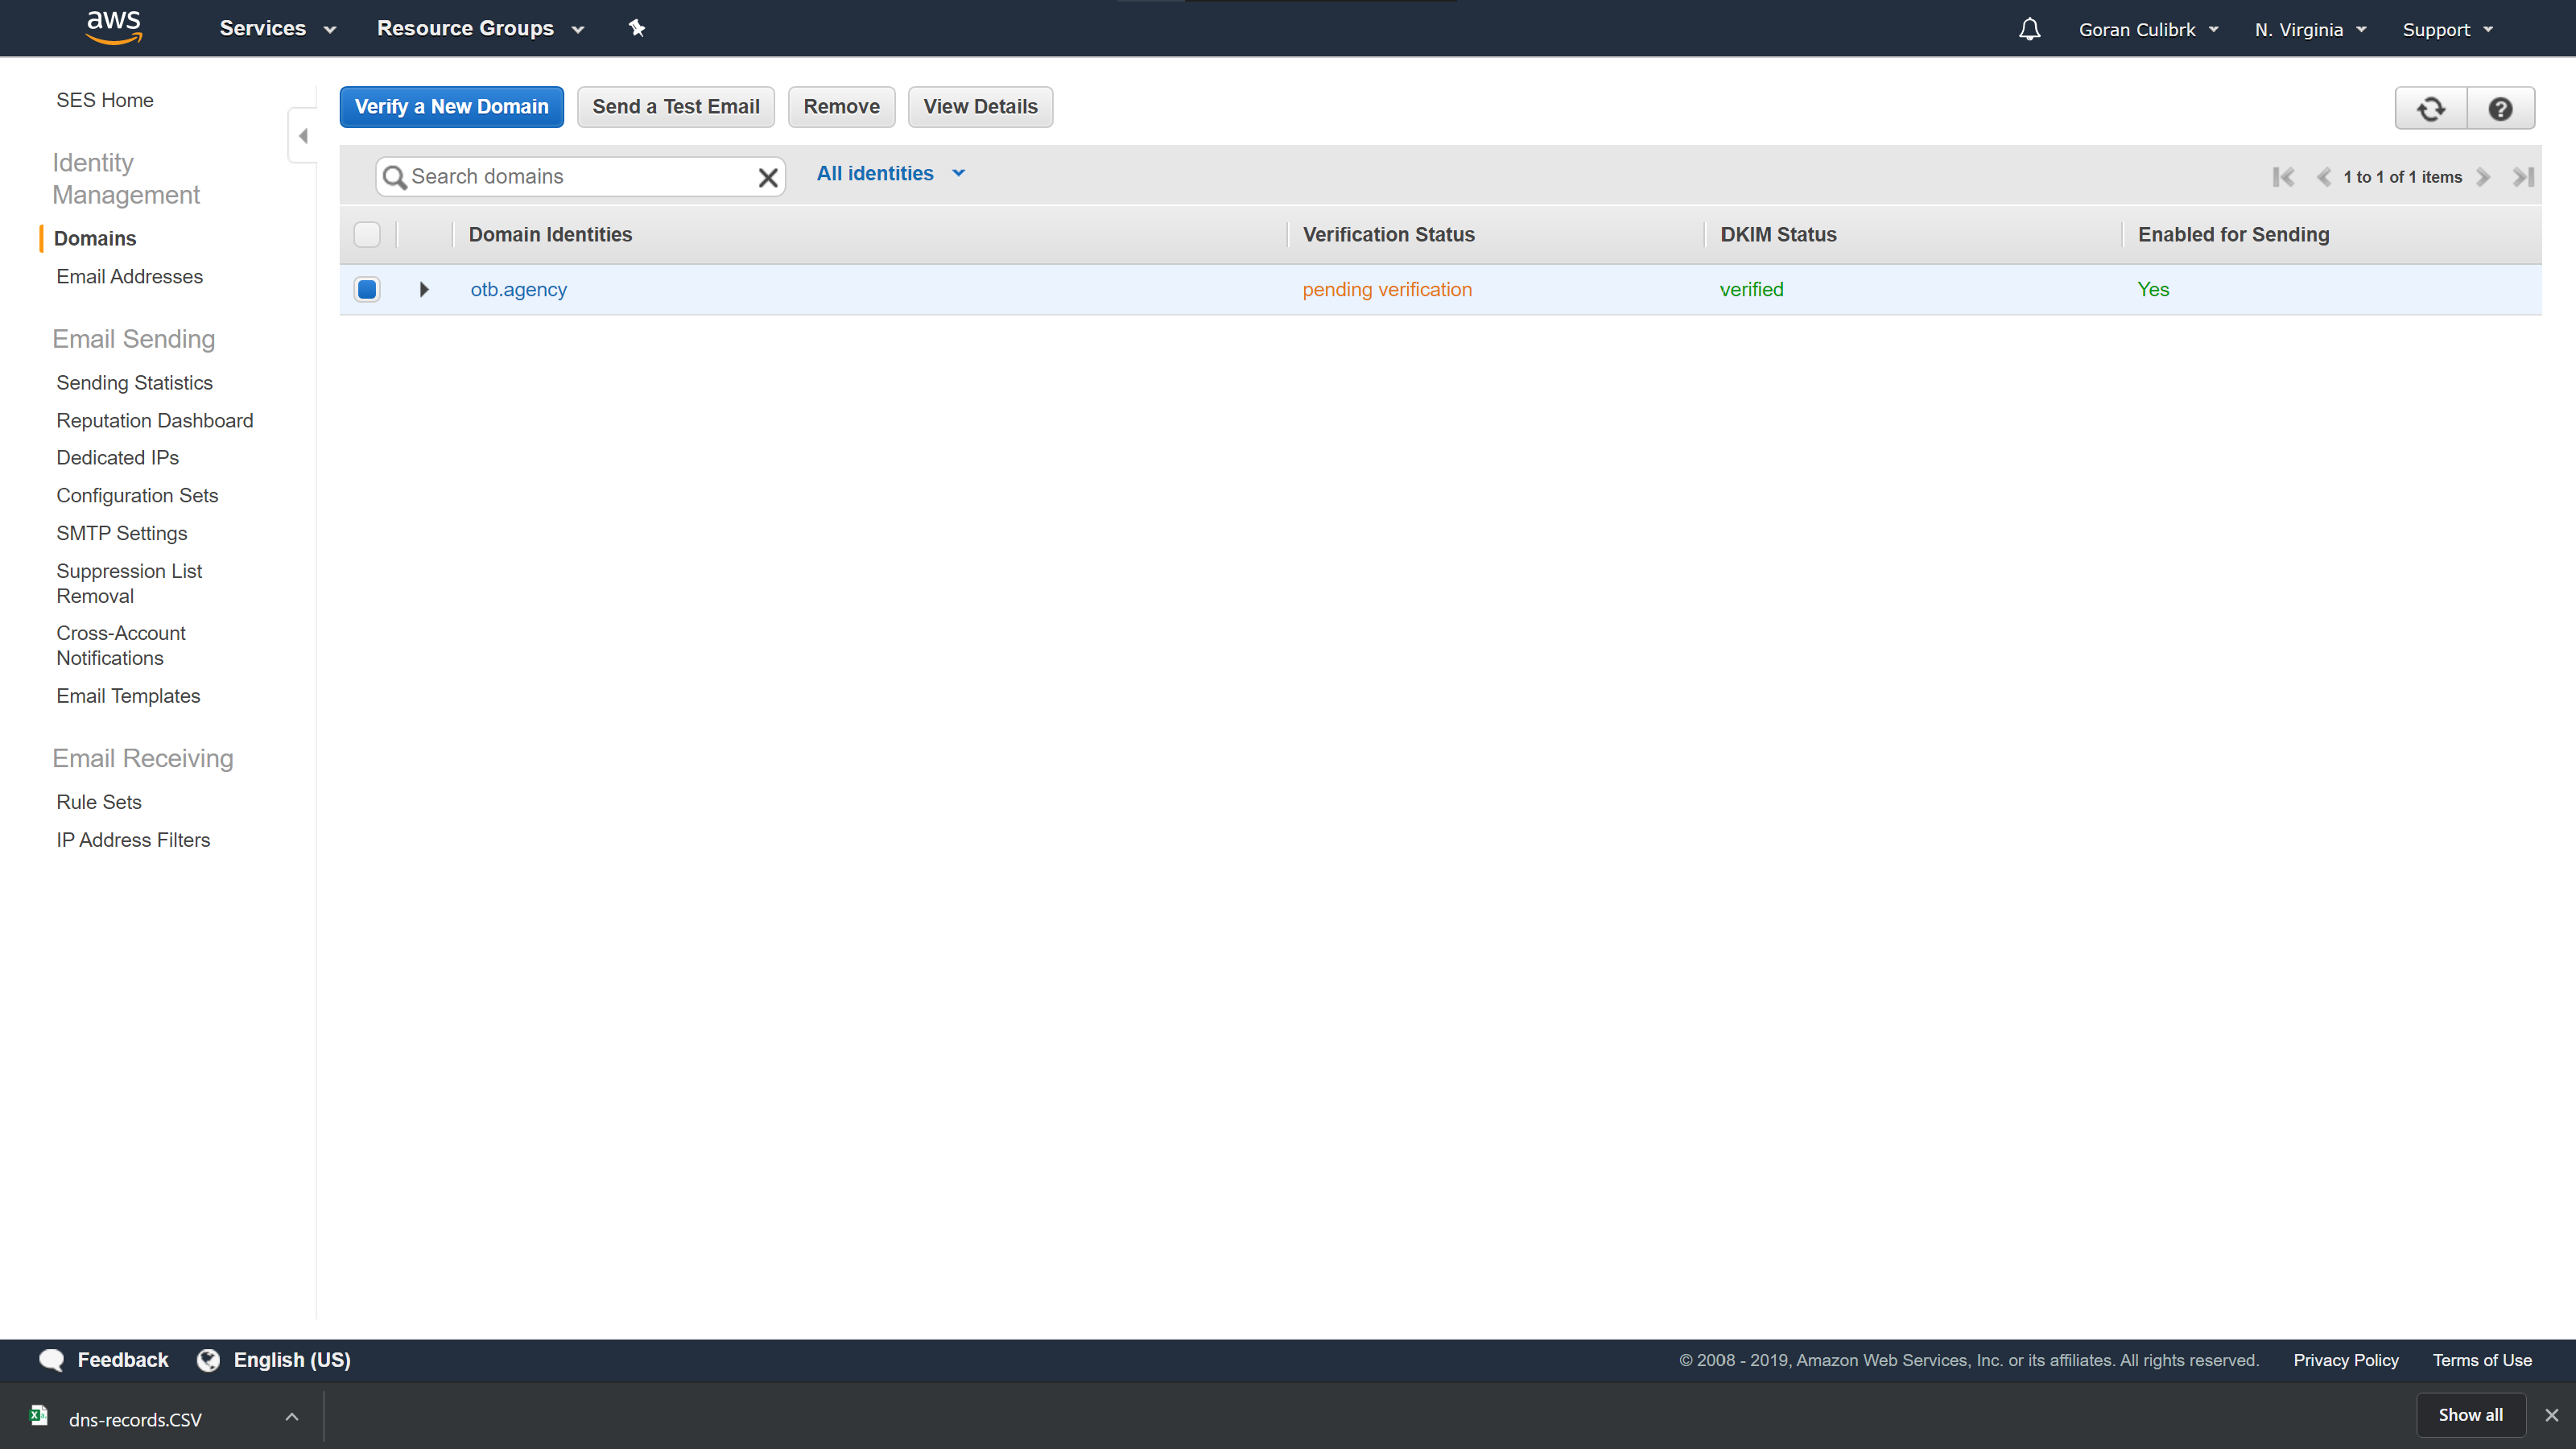
After you update the DNS records, it will take some time for Amazon to check for them and confirm that they are valid and the domain is verified.
Domain pending verification
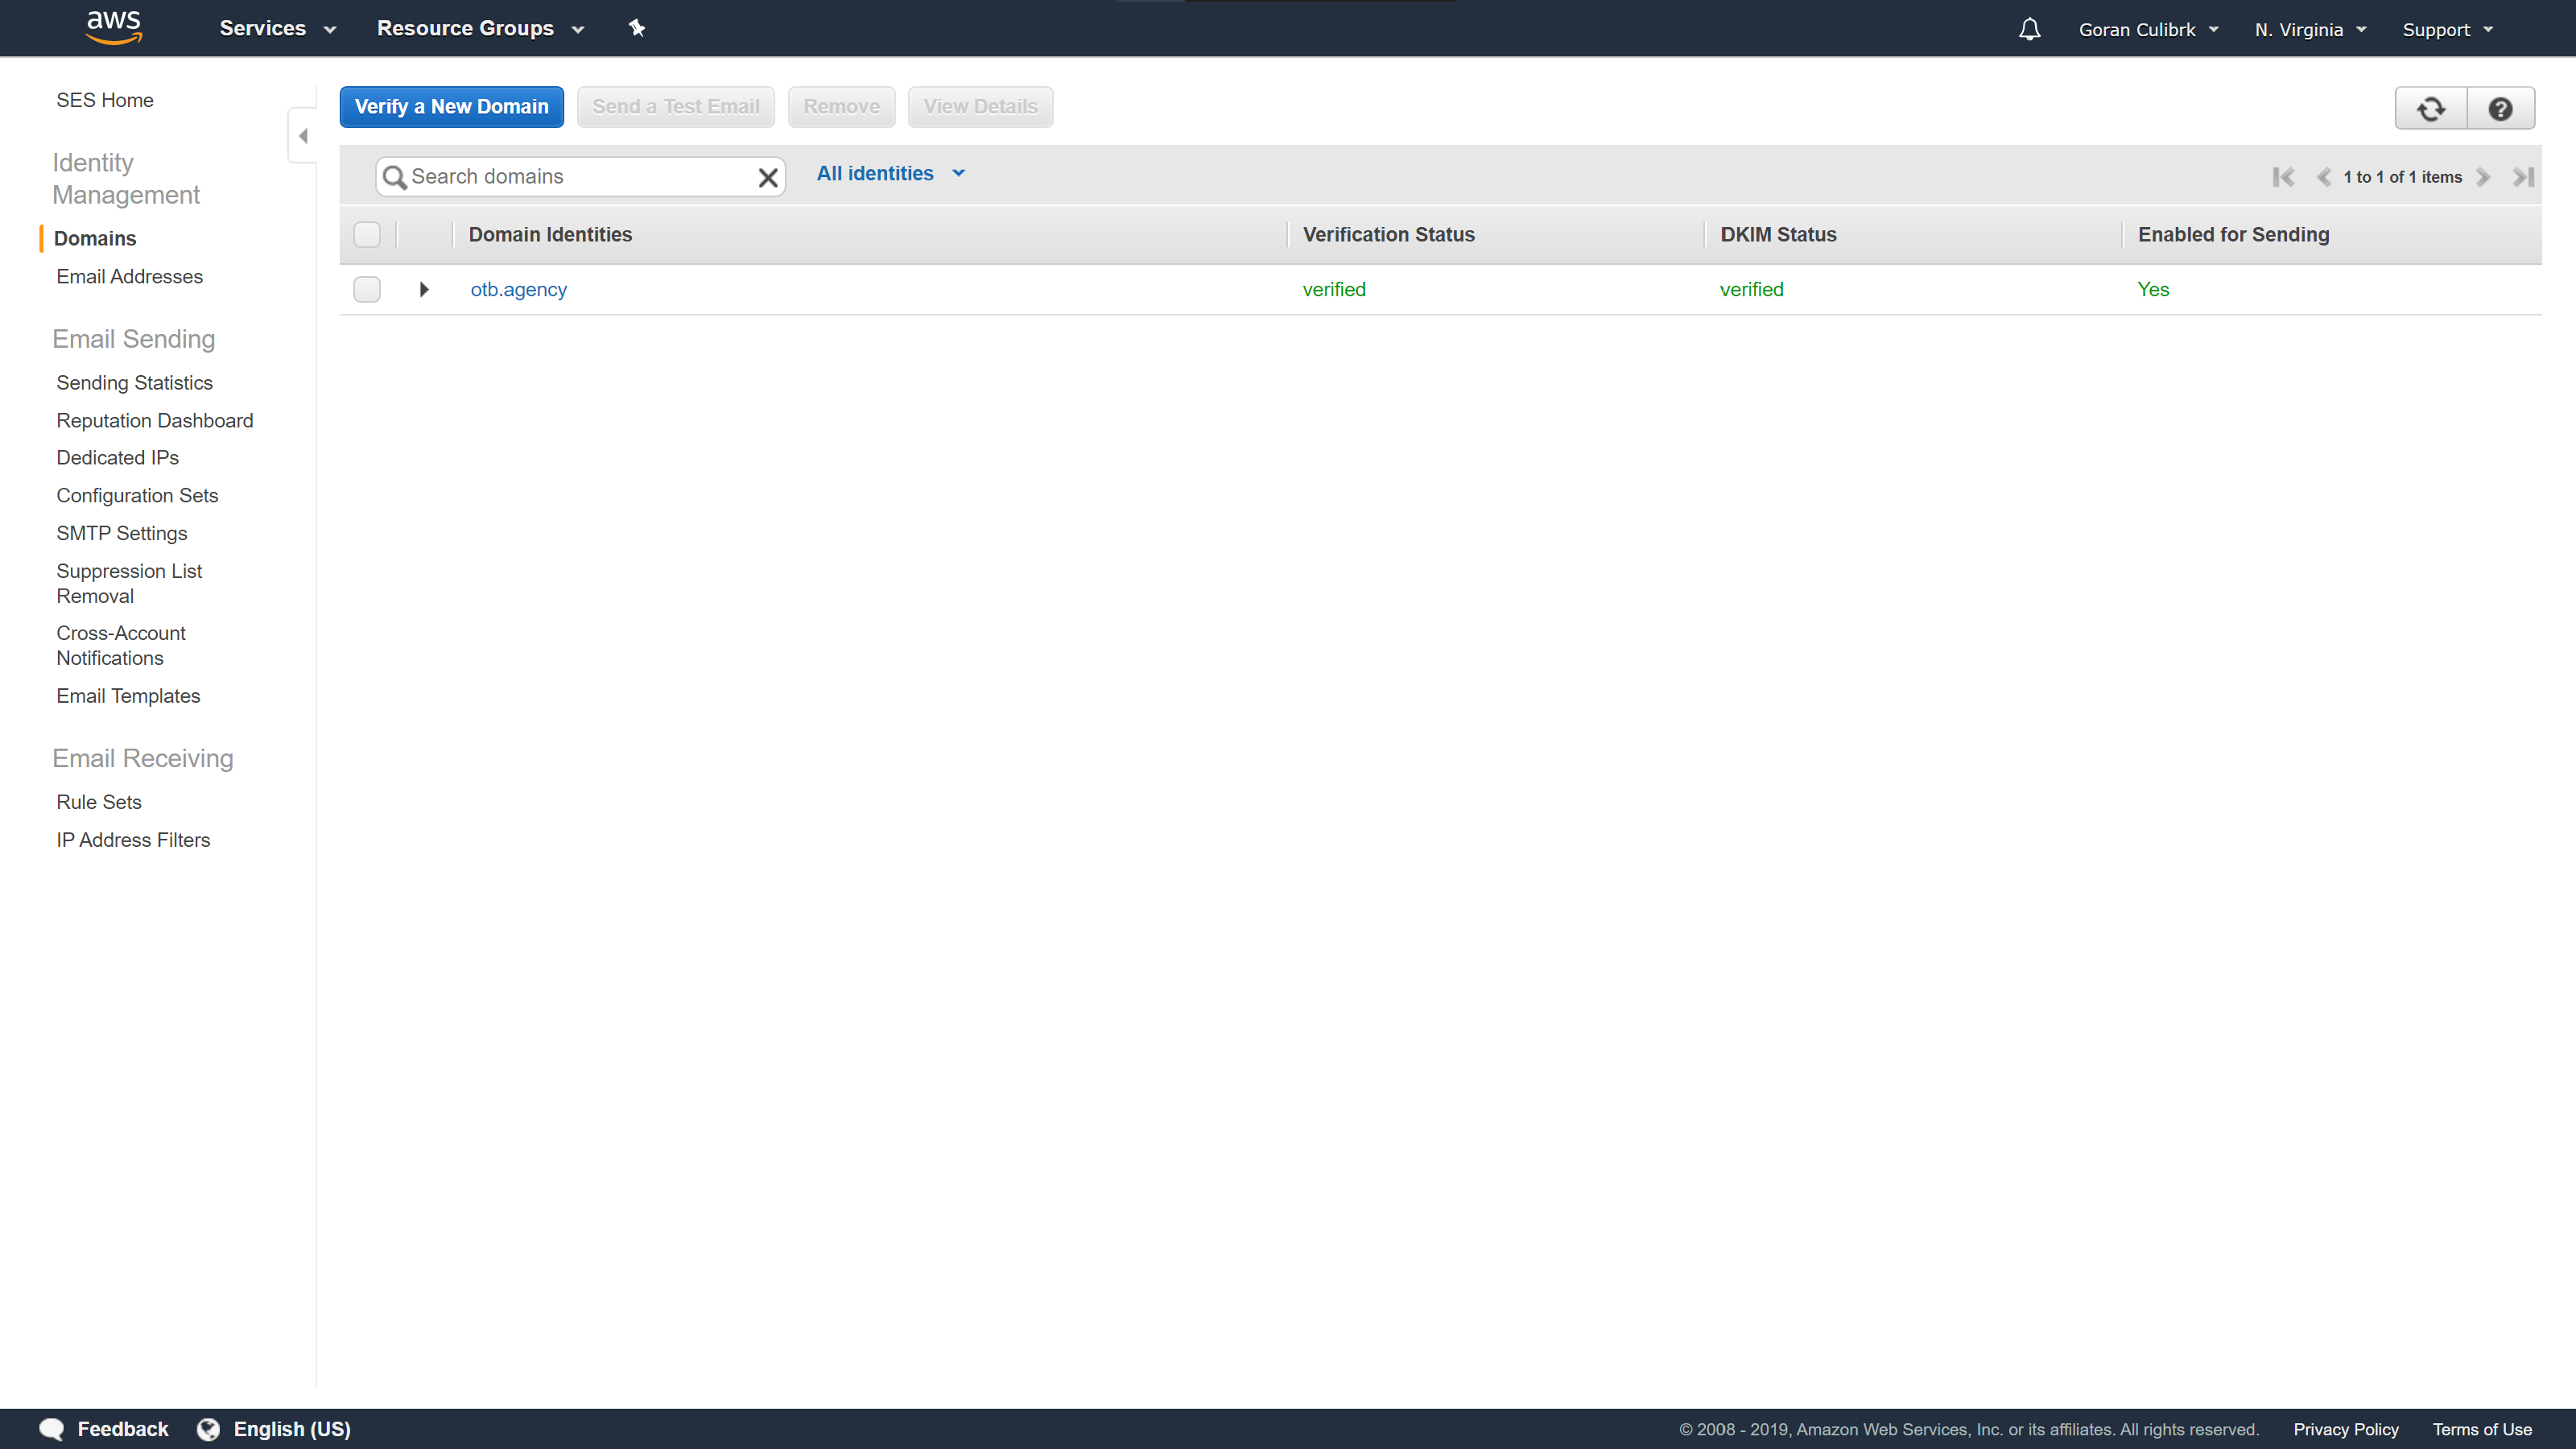
This step is completed once all three columns in the list are Verified like in the picture below.
Domain verification completed
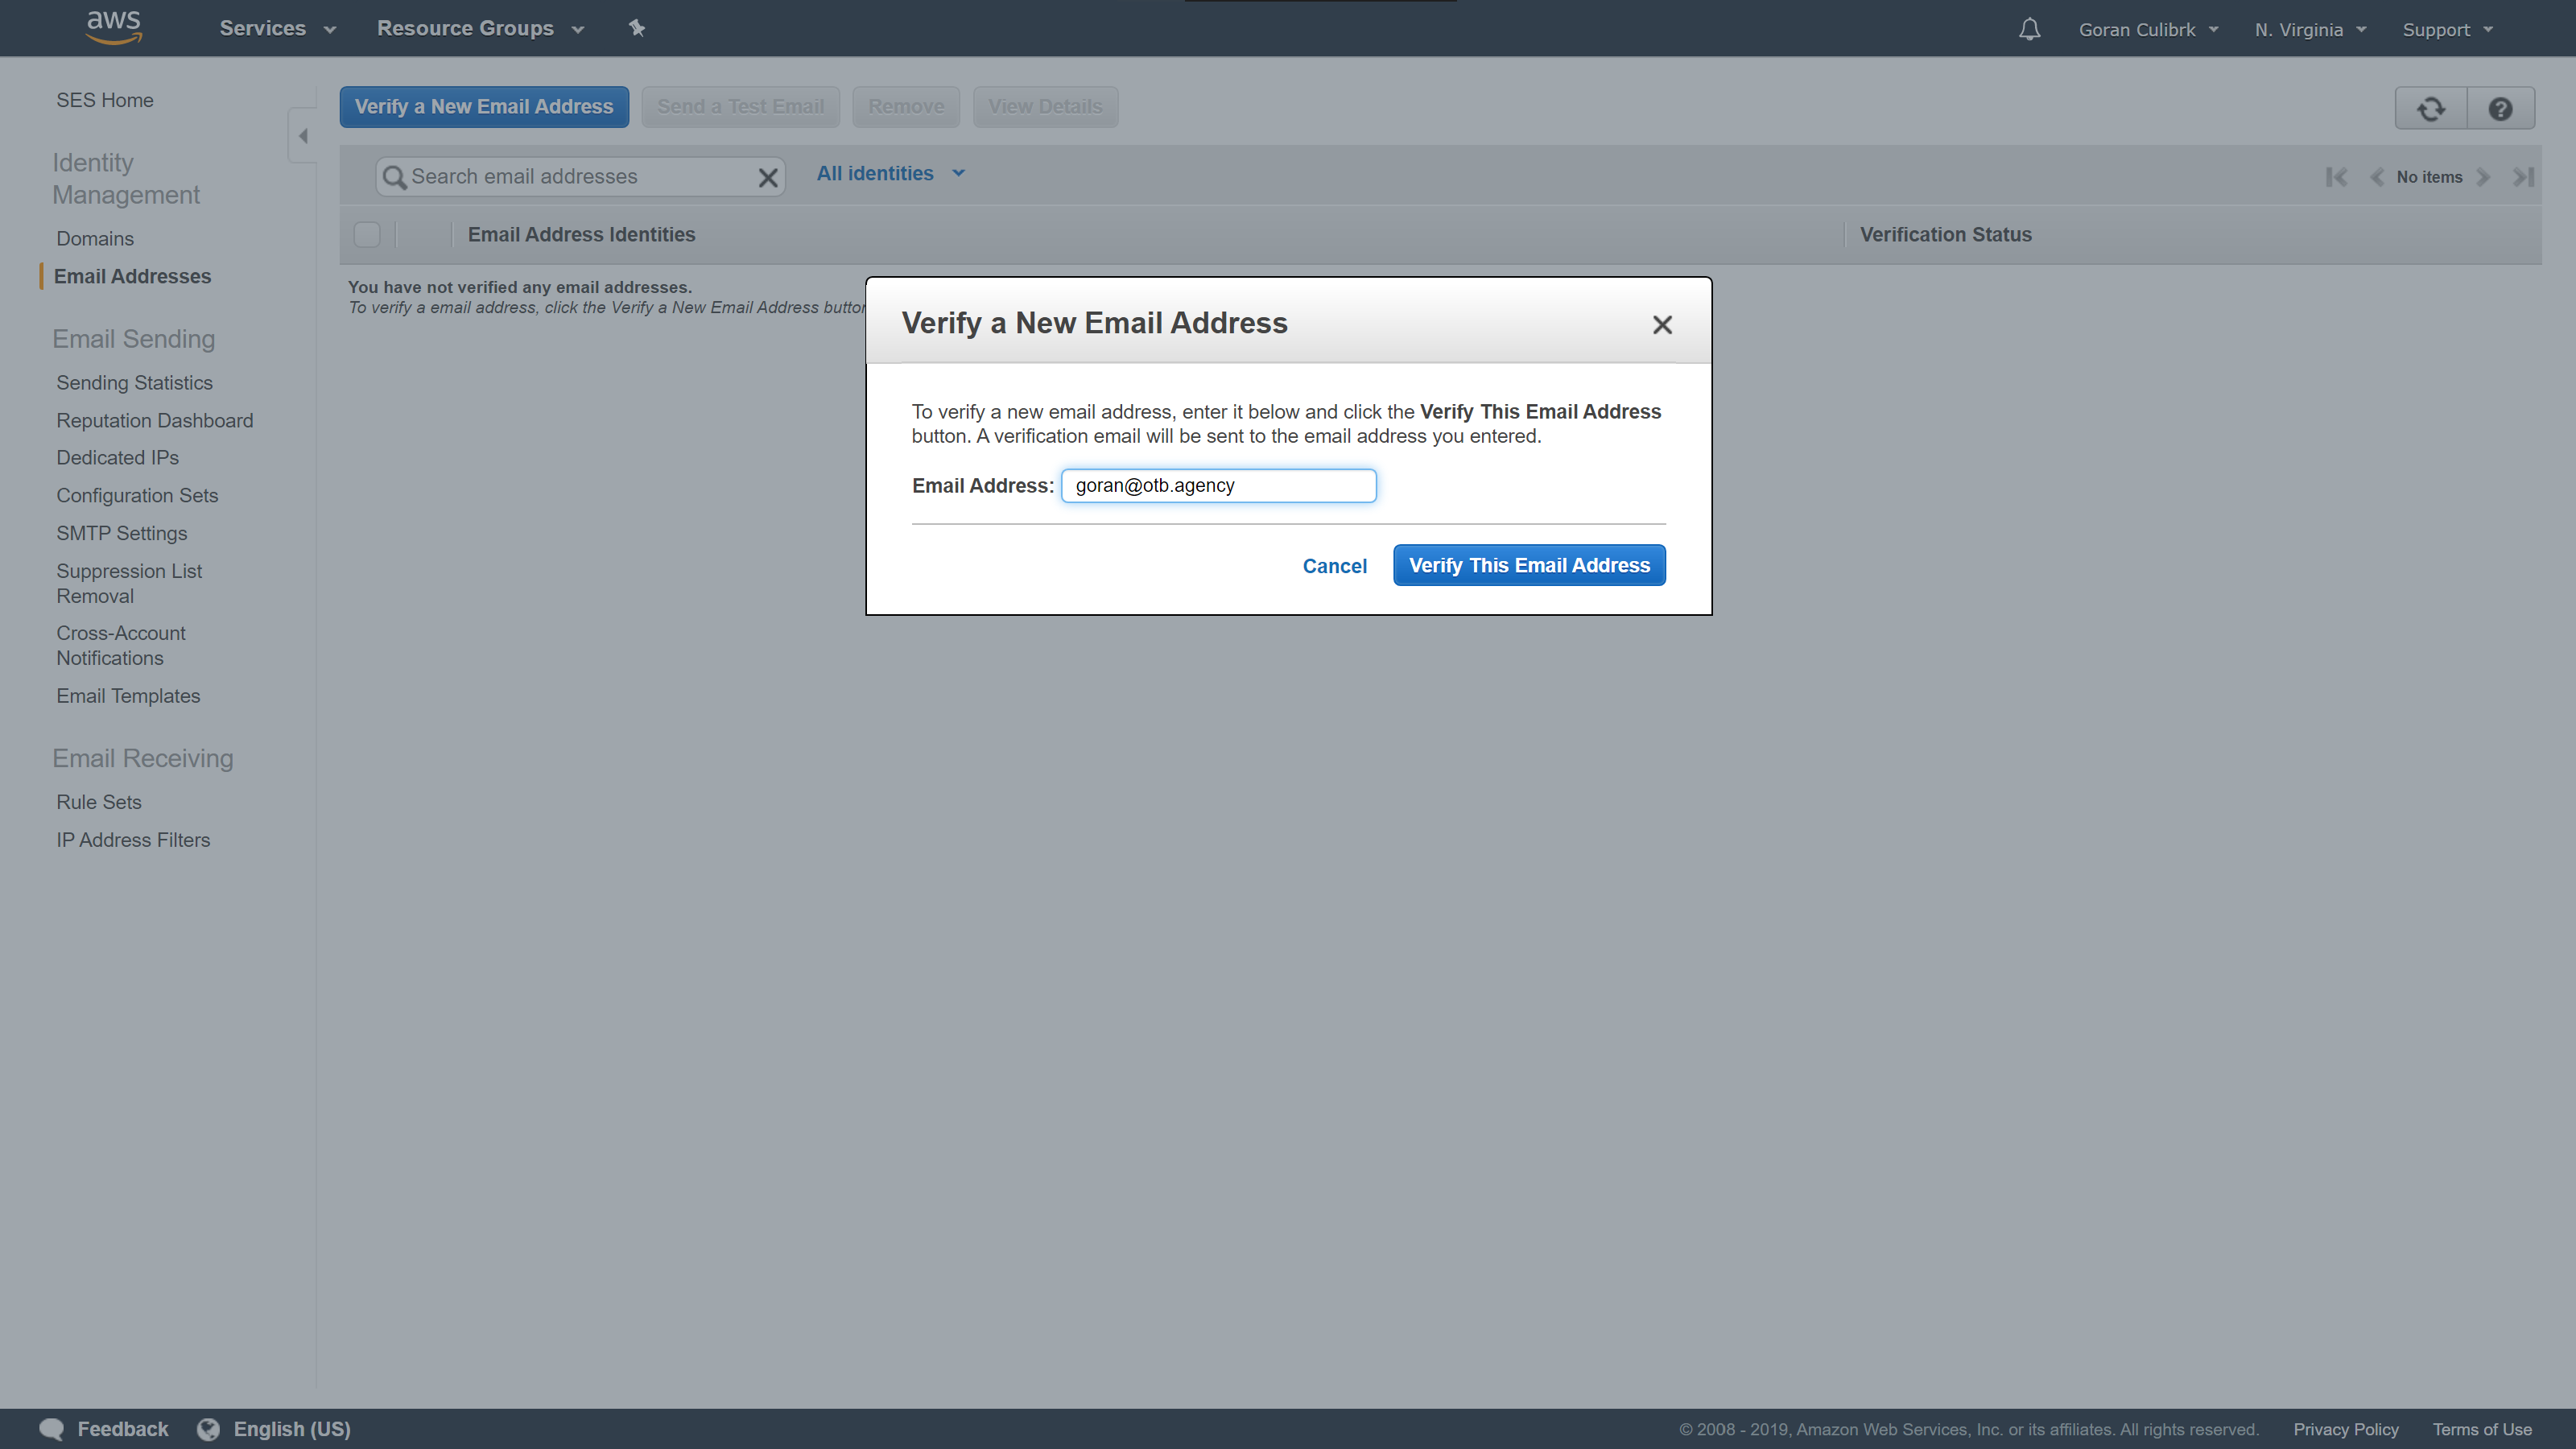
Now we can proceed to specific email address verification steps which is quite simple and straight forward. Go to the Email addresses page in the sidebar and click Verify a New Email Address button. In the form, enter the email address you want to use to send emails from Mautic and click Verify This Email Address button.
Adding new email address
Once you click the button, you will receive an email from Amazon to the added address with confirmation link. Once you confirm it, return to the AWS dashboard and refresh the page. You should have Verification status changed from Pending verification to Verified.
If you have, congratulations, you have allowed Amazon to send emails in your behalf, providing you with the cheap and fast solution for mass sending of your emails.
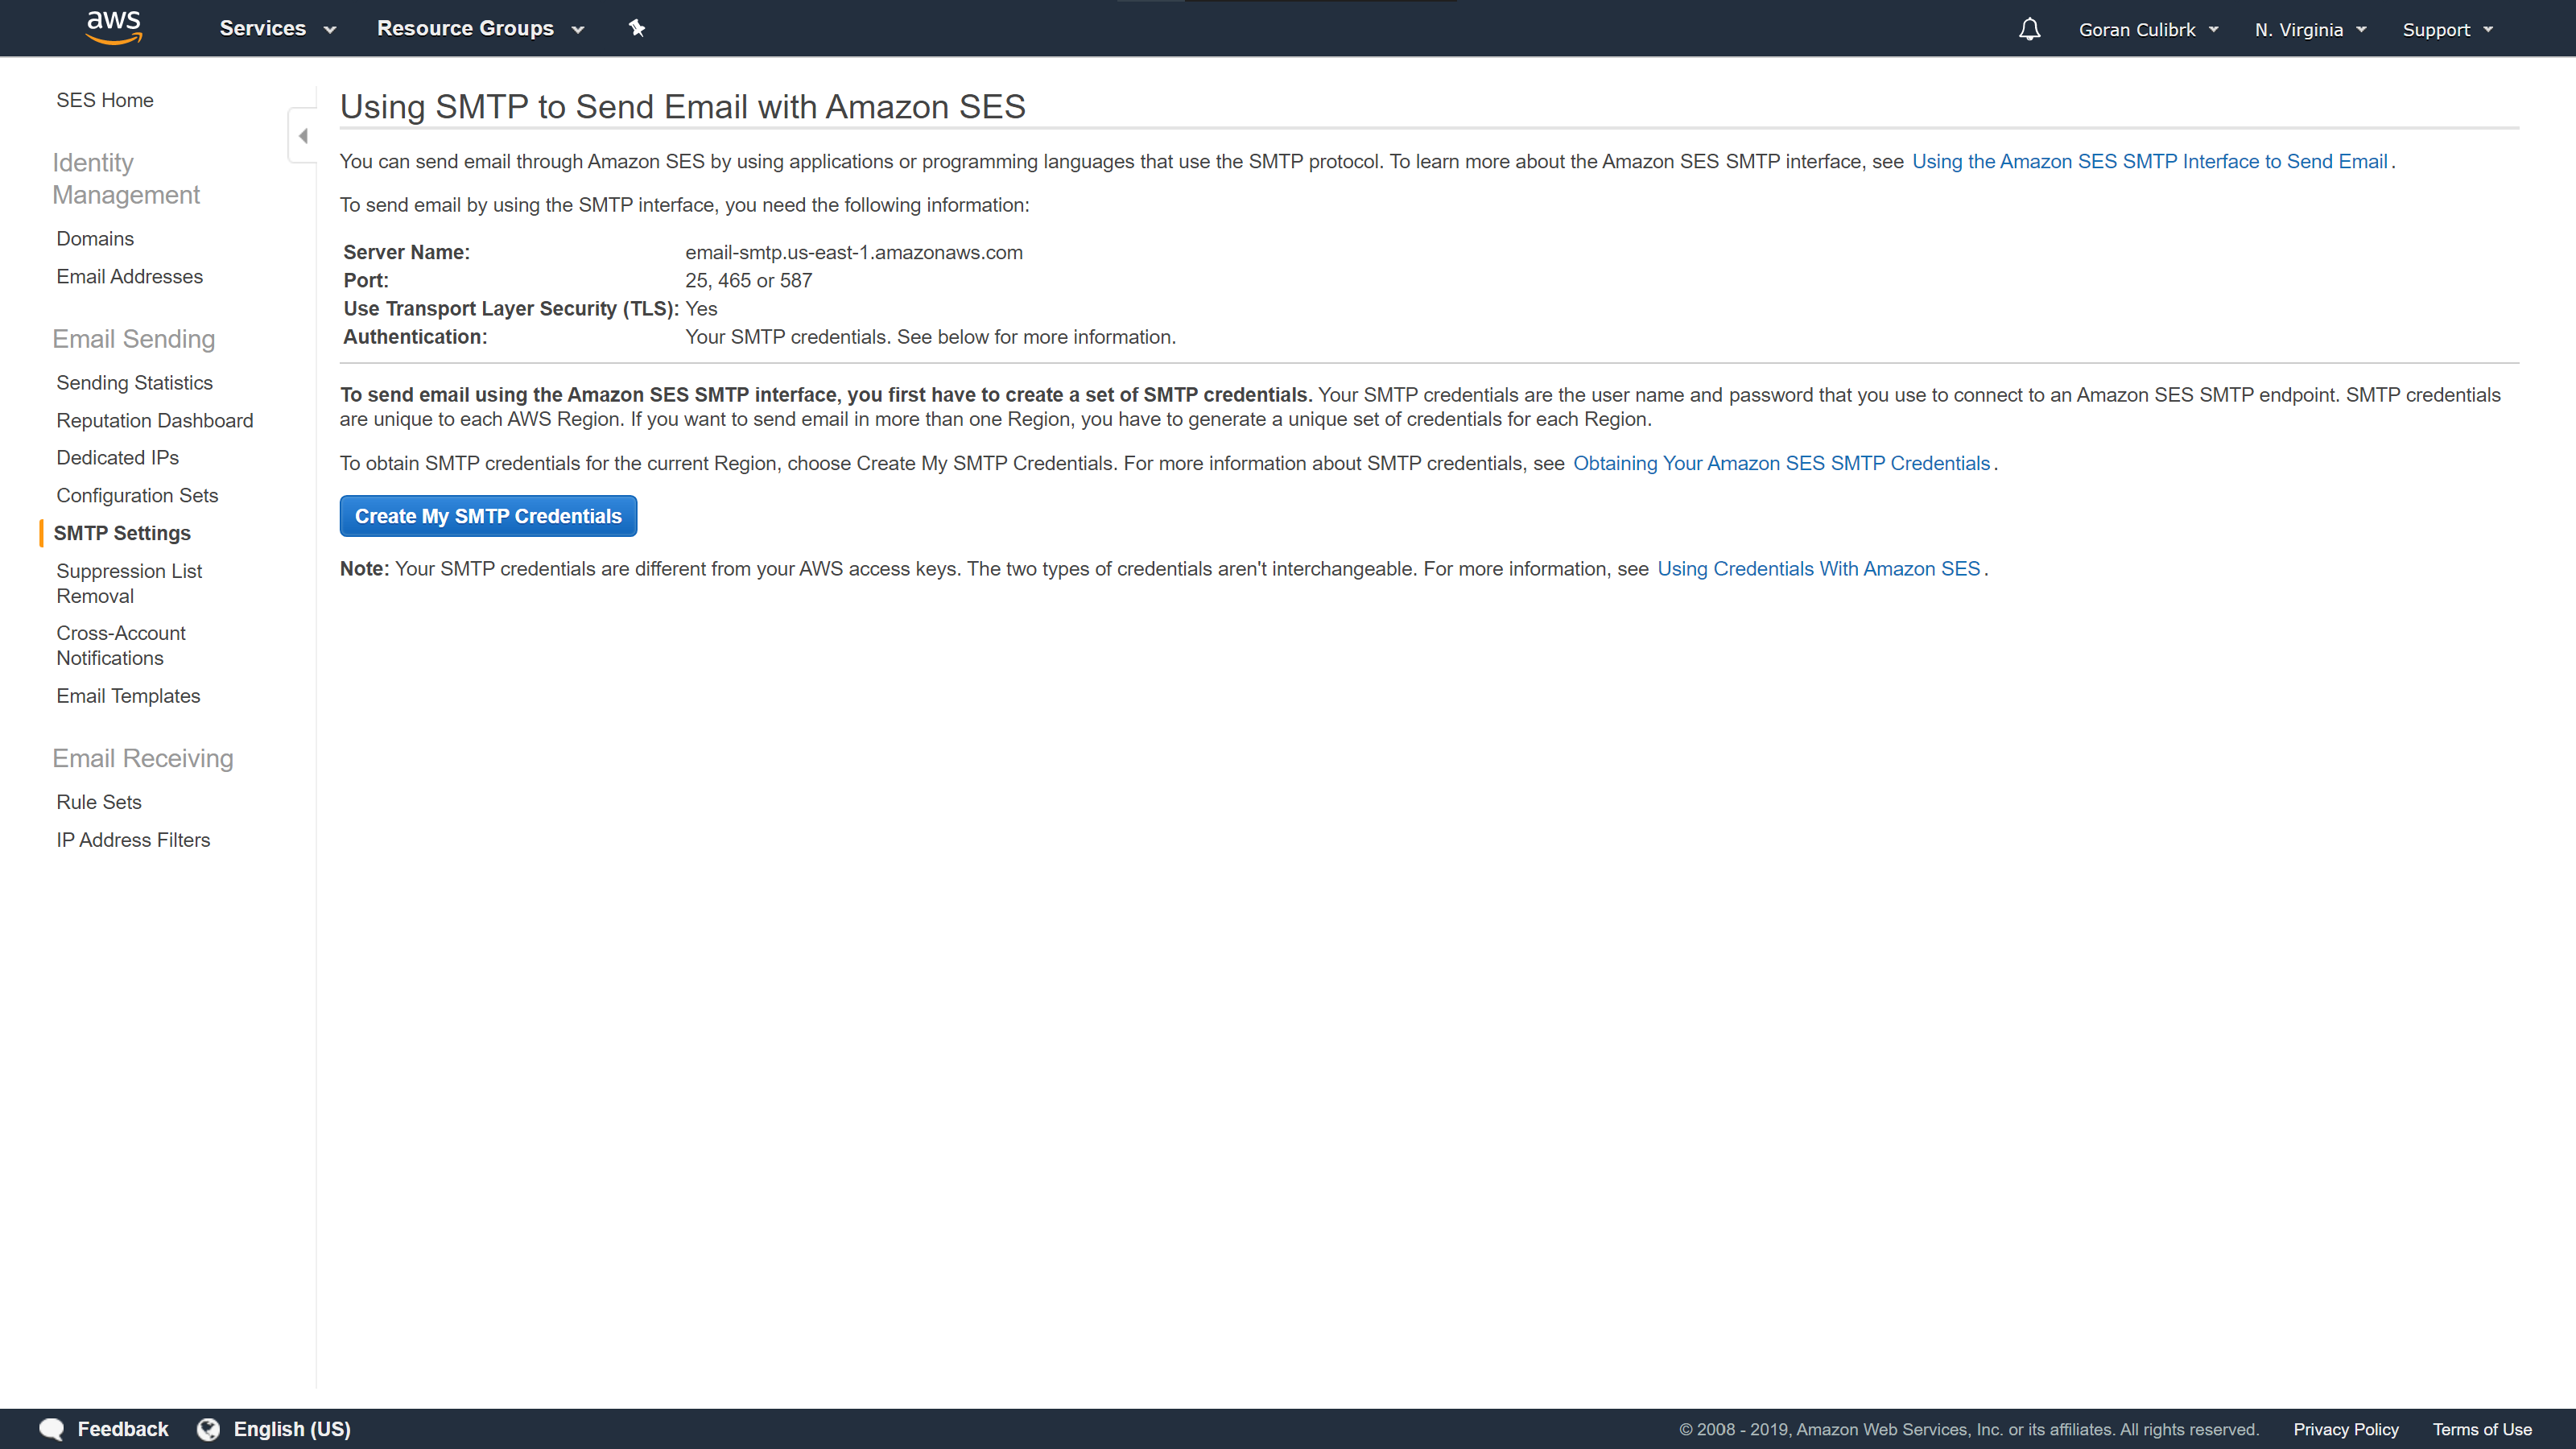
Our next steps is to generate credentials that will allow Mautic to communicate with Amazon and send emails. To do that, you need to create SMTP credentials in Amazon. Go to the SMTP Settings in the sidebar. Remember or copy somewhere Server Name and Port and click Create my SMTP Credentials button.
Create SMTP Credentials
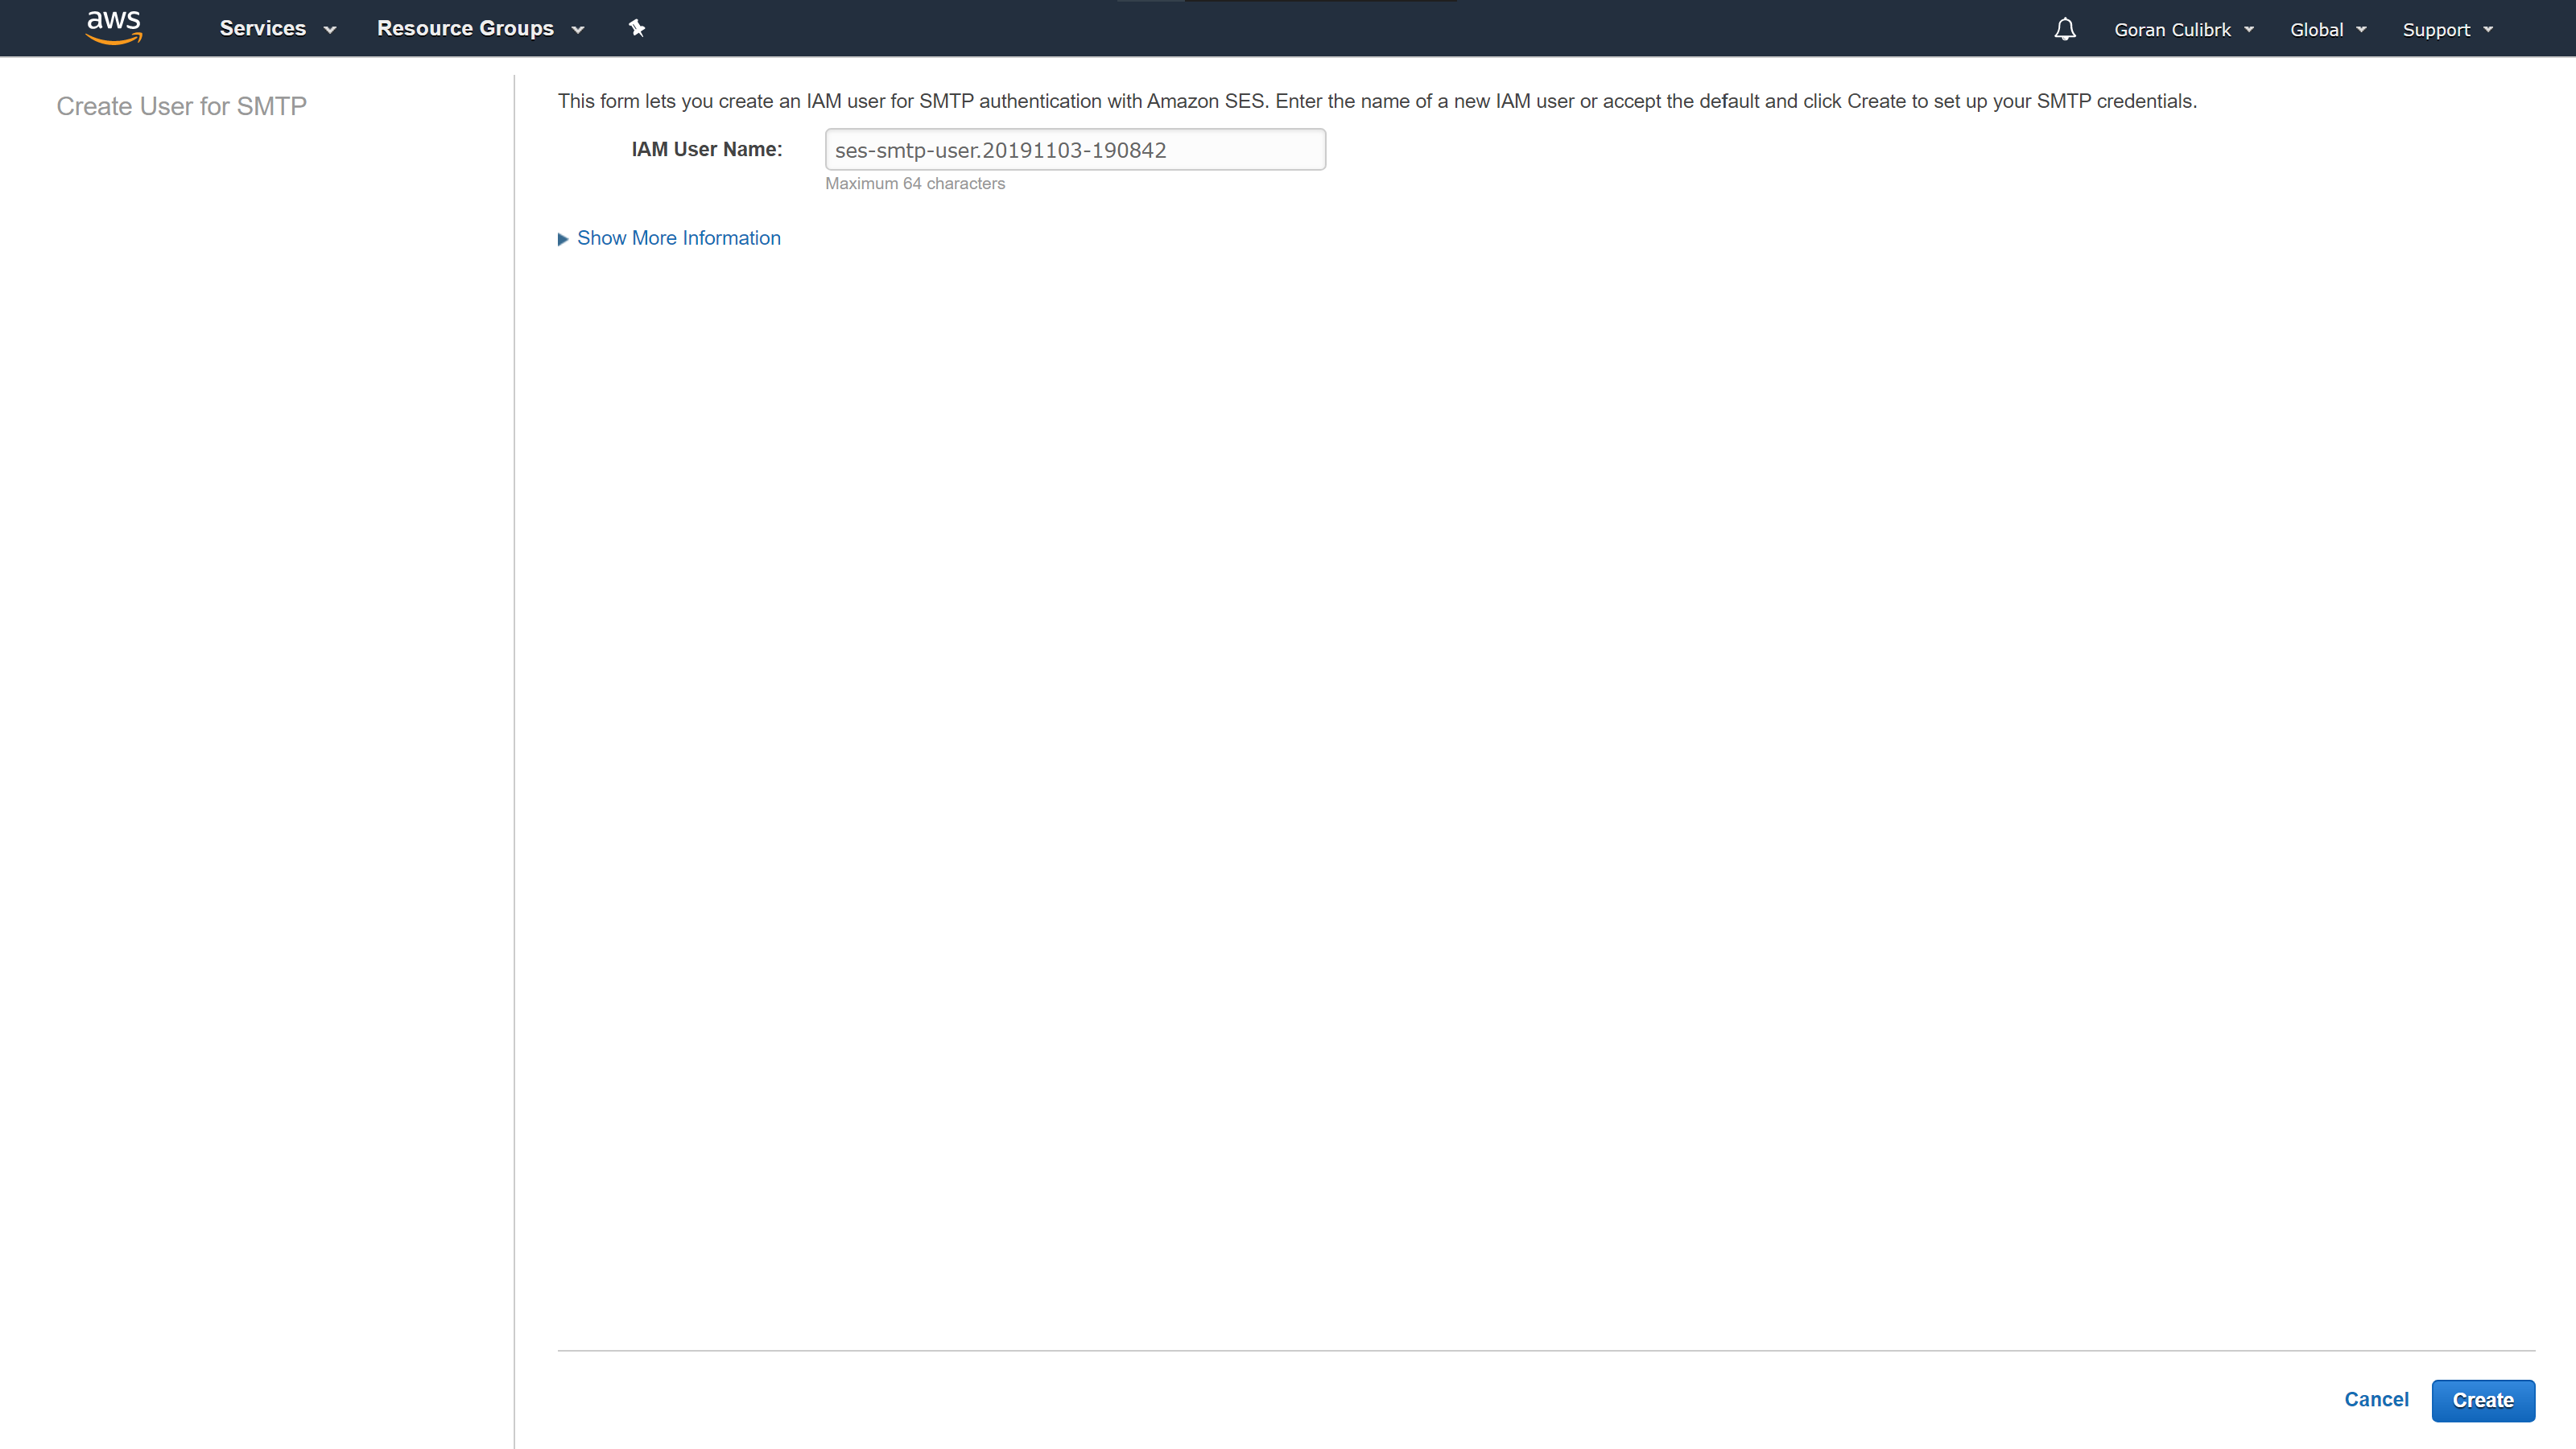
For the IAM username, you can use whatever you want, or leave the default one, but for later organization, it would be good to make it a bit more understandable. Once you are done, click Create.
Create IAM User
After that you will be provided with your SMTP username and password. You can see them immediately by clicking Show User SMTP Security Credentials but keep in mind that you will only be able to see them from dashboard on that screen you once you close the window, you will lose the option to check for password. In order to keep it in case you need it again, I recommend that you download them and store somewhere secure.
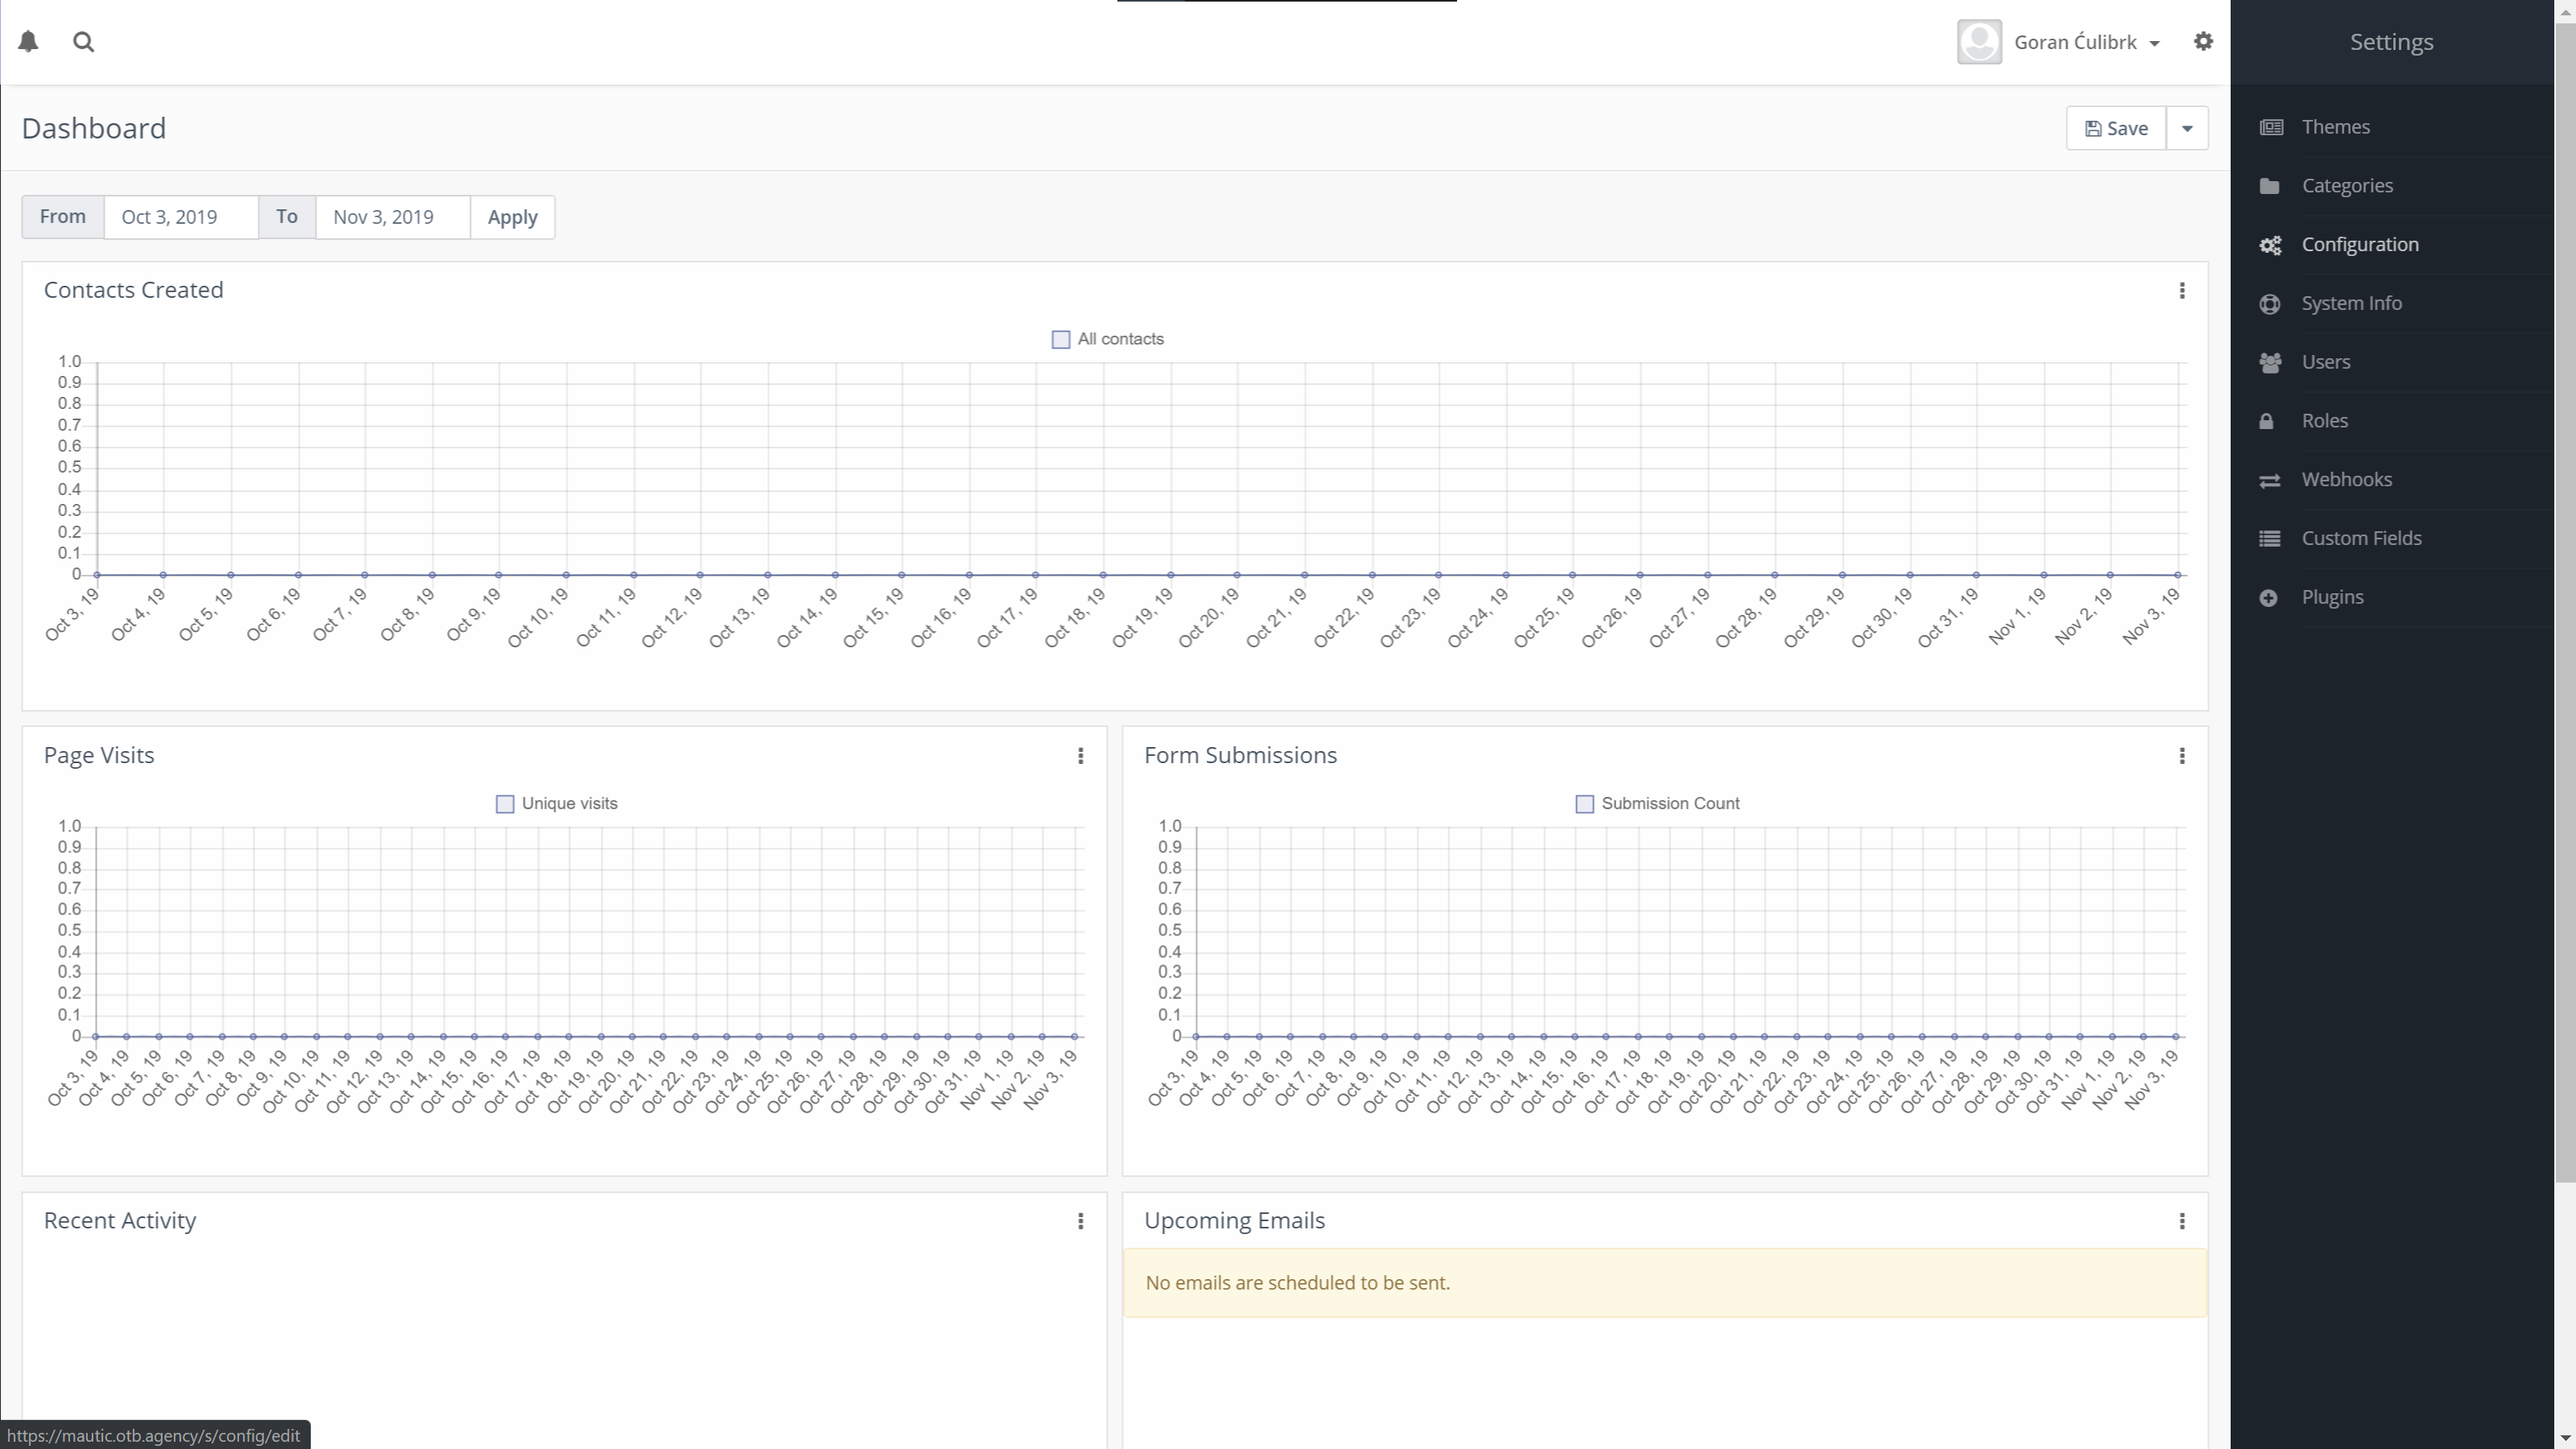
With that step completed, we are ready to close Amazon dashboard and go back to our Mautic installation and open up Configuration page.
Open Mautic configuration
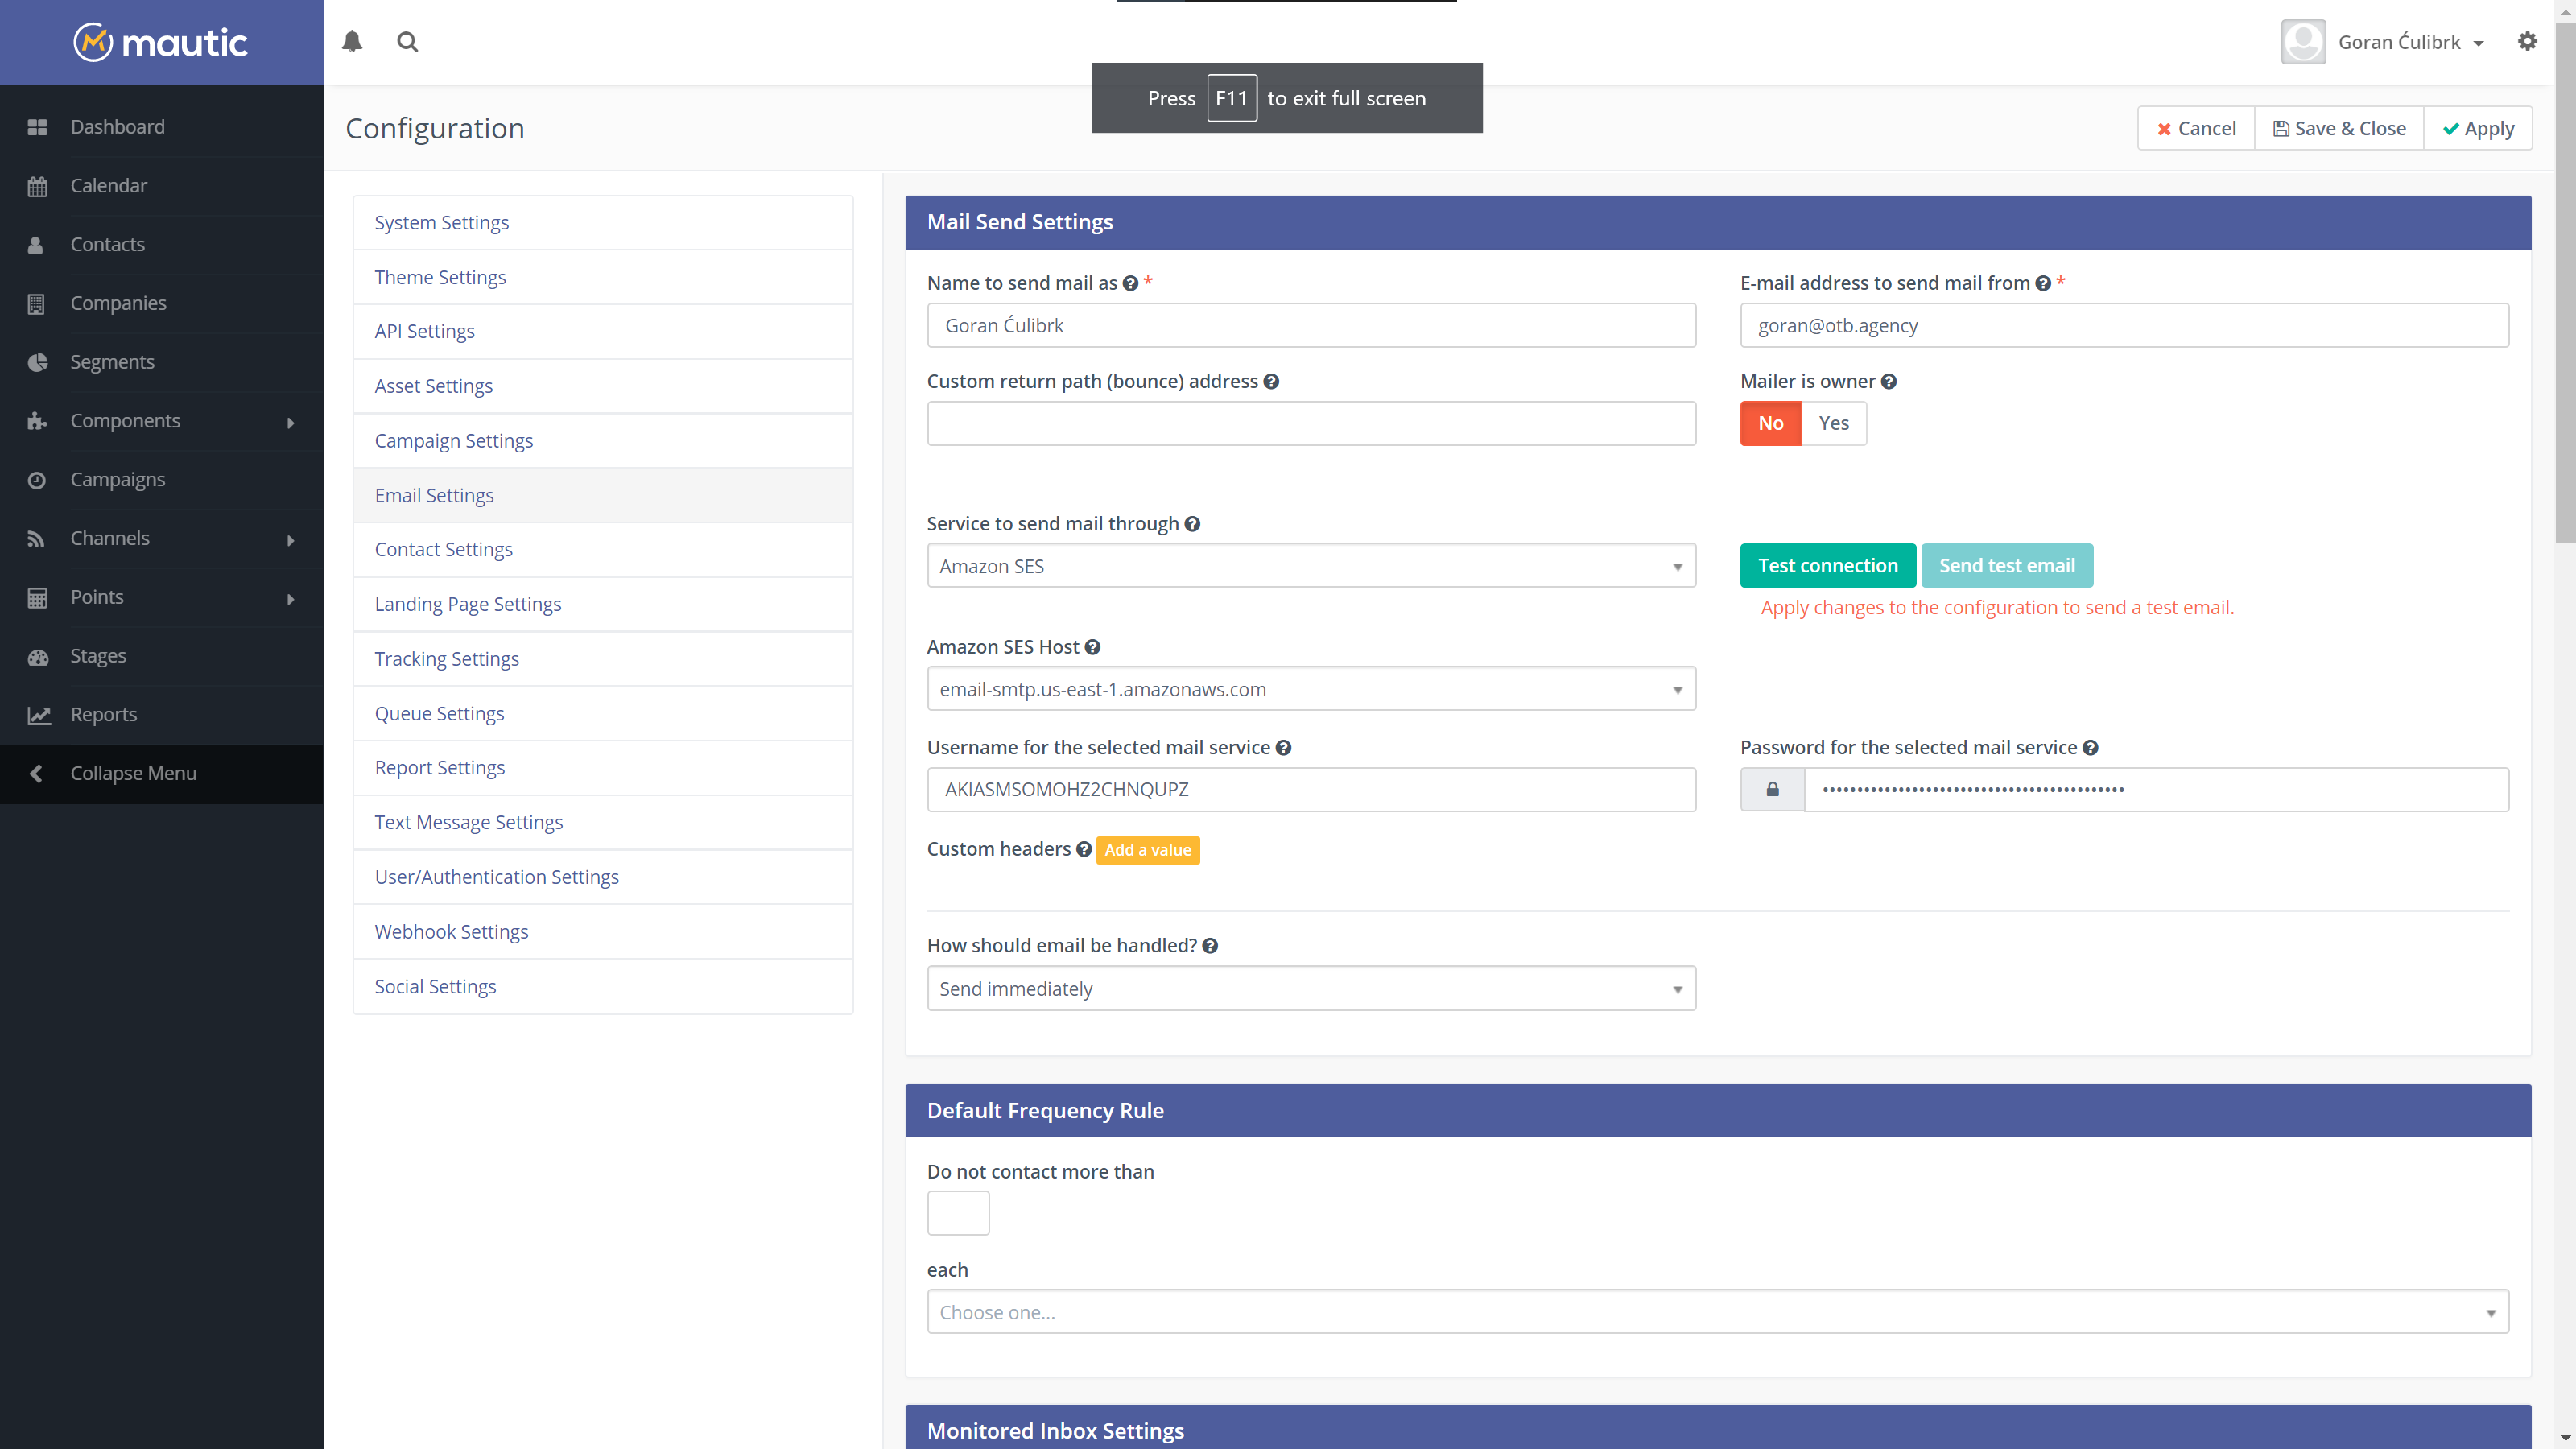
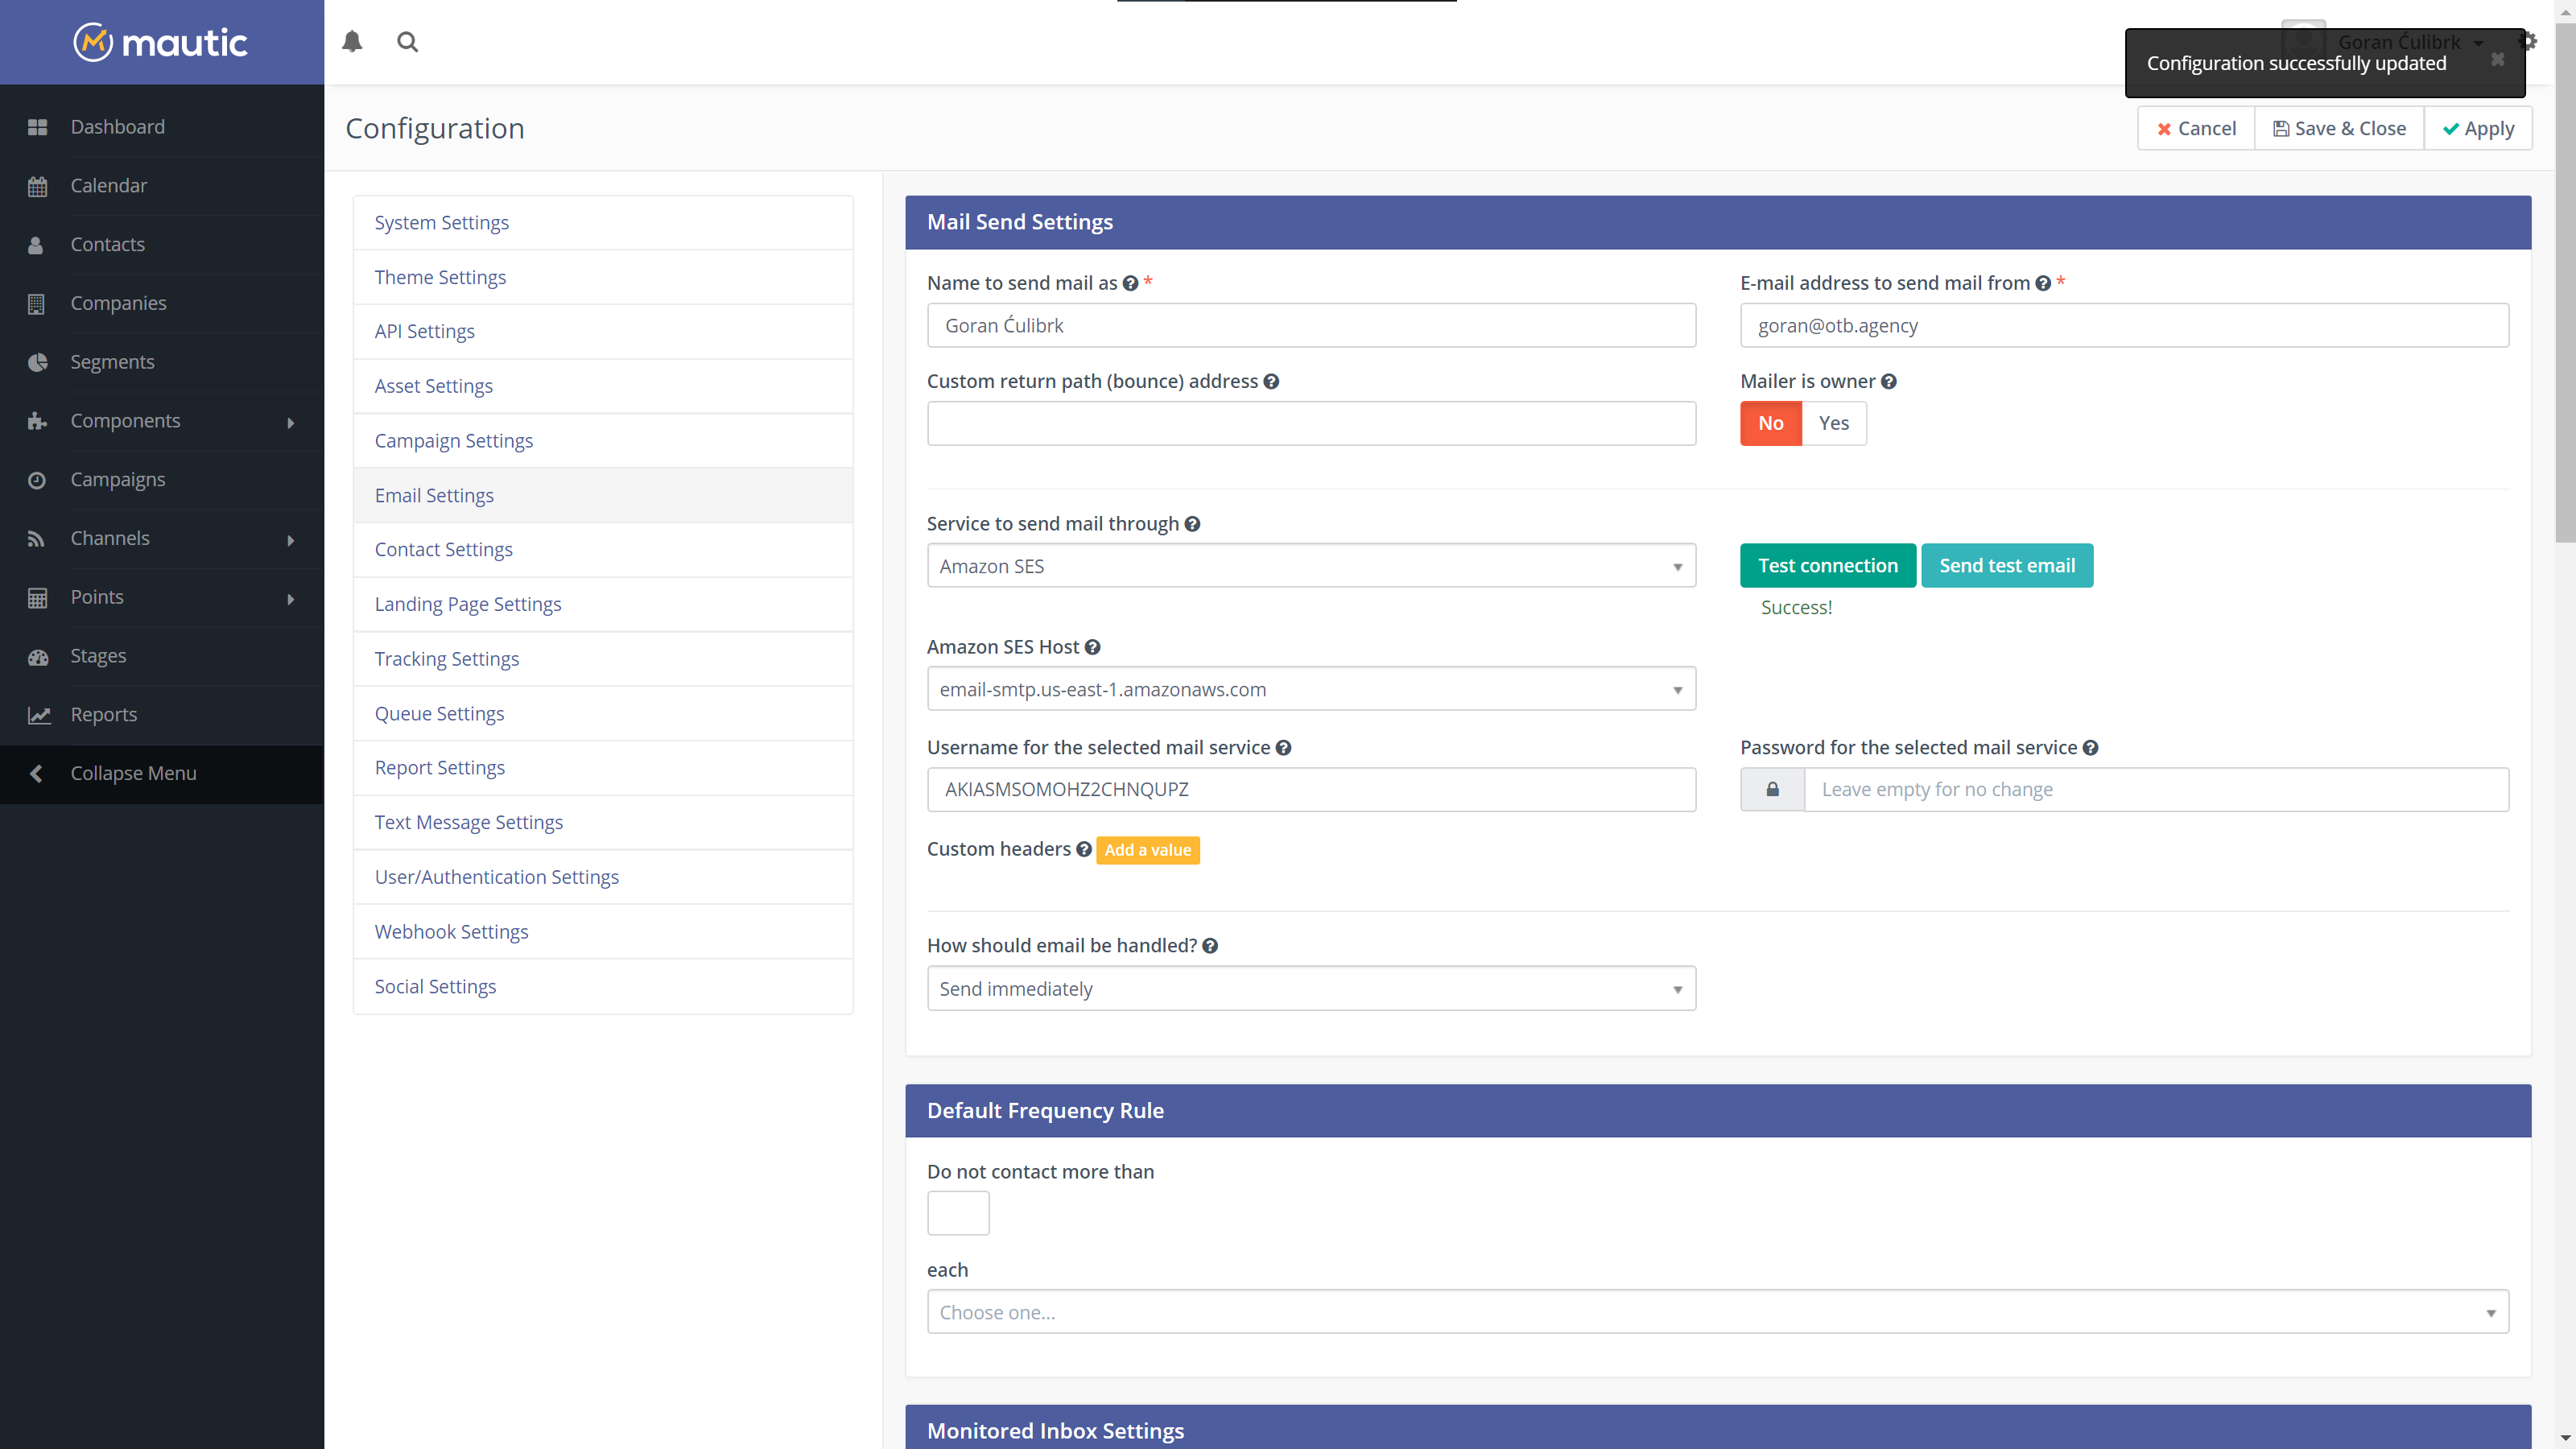
Open up Email Settings tab in the sidebar. Under Service to send mail through select Amazon SES.
Amazon SES Host represents region (Server name) that you copied when you were creating SMTP credentials. For Username and Password use credentials that you created and finally click Apply button to save the changes. After that click Test connection to verify that everything is working correctly.
Enter SMTP credentials to Mautic
In order to confirm the configuration, you can click Send test email button. This will send test message to your email address. If you receive it your Mautic + Amazon SES configuration is completed and you can start sending emails from your instance.
Test settings completed
But before you start doing that, keep in mind that Amazon don’t like high bounce rates so we will have to configure our Mautic to handle them and remove those contacts from future emails. For that I’ll see you in part 4 of our Mautic installation series.
Welcome to part 2 of the Mautic installation series. In the previous part, we were preparing our fresh Ubuntu 18.04 server for hosting open-source marketing automation platform Mautic. In case you missed it, check out the part 1, Configuring Ubuntu 18.04 for Mautic hosting.
Downloading Mautic files
Now, we are stepping into the installation procedure and initial configuration. For that, we will have to get back to the terminal one more time, before the installation.
So, you need to ssh to your server
ssh user@server-ip
If you created phpinfo file from the previous article, you will first need to remove it and then enter your htdocs folder on the server
sudo rm -rf /var/www/mautic.yourdomain.com/htdocs/*
cd /var/www/mautic.yourdomain.com/htdocs
Head over to Mautic GitHub repository and download the latest release (at the time of writing, the most recent version is 2.15.3).
After that, let’s change the owner of the files from root to www-data to avoid any errors running the app.
cd /var/www/mautic.yourdomain.com/
sudo chown -R www-data:www-data htdocs/*
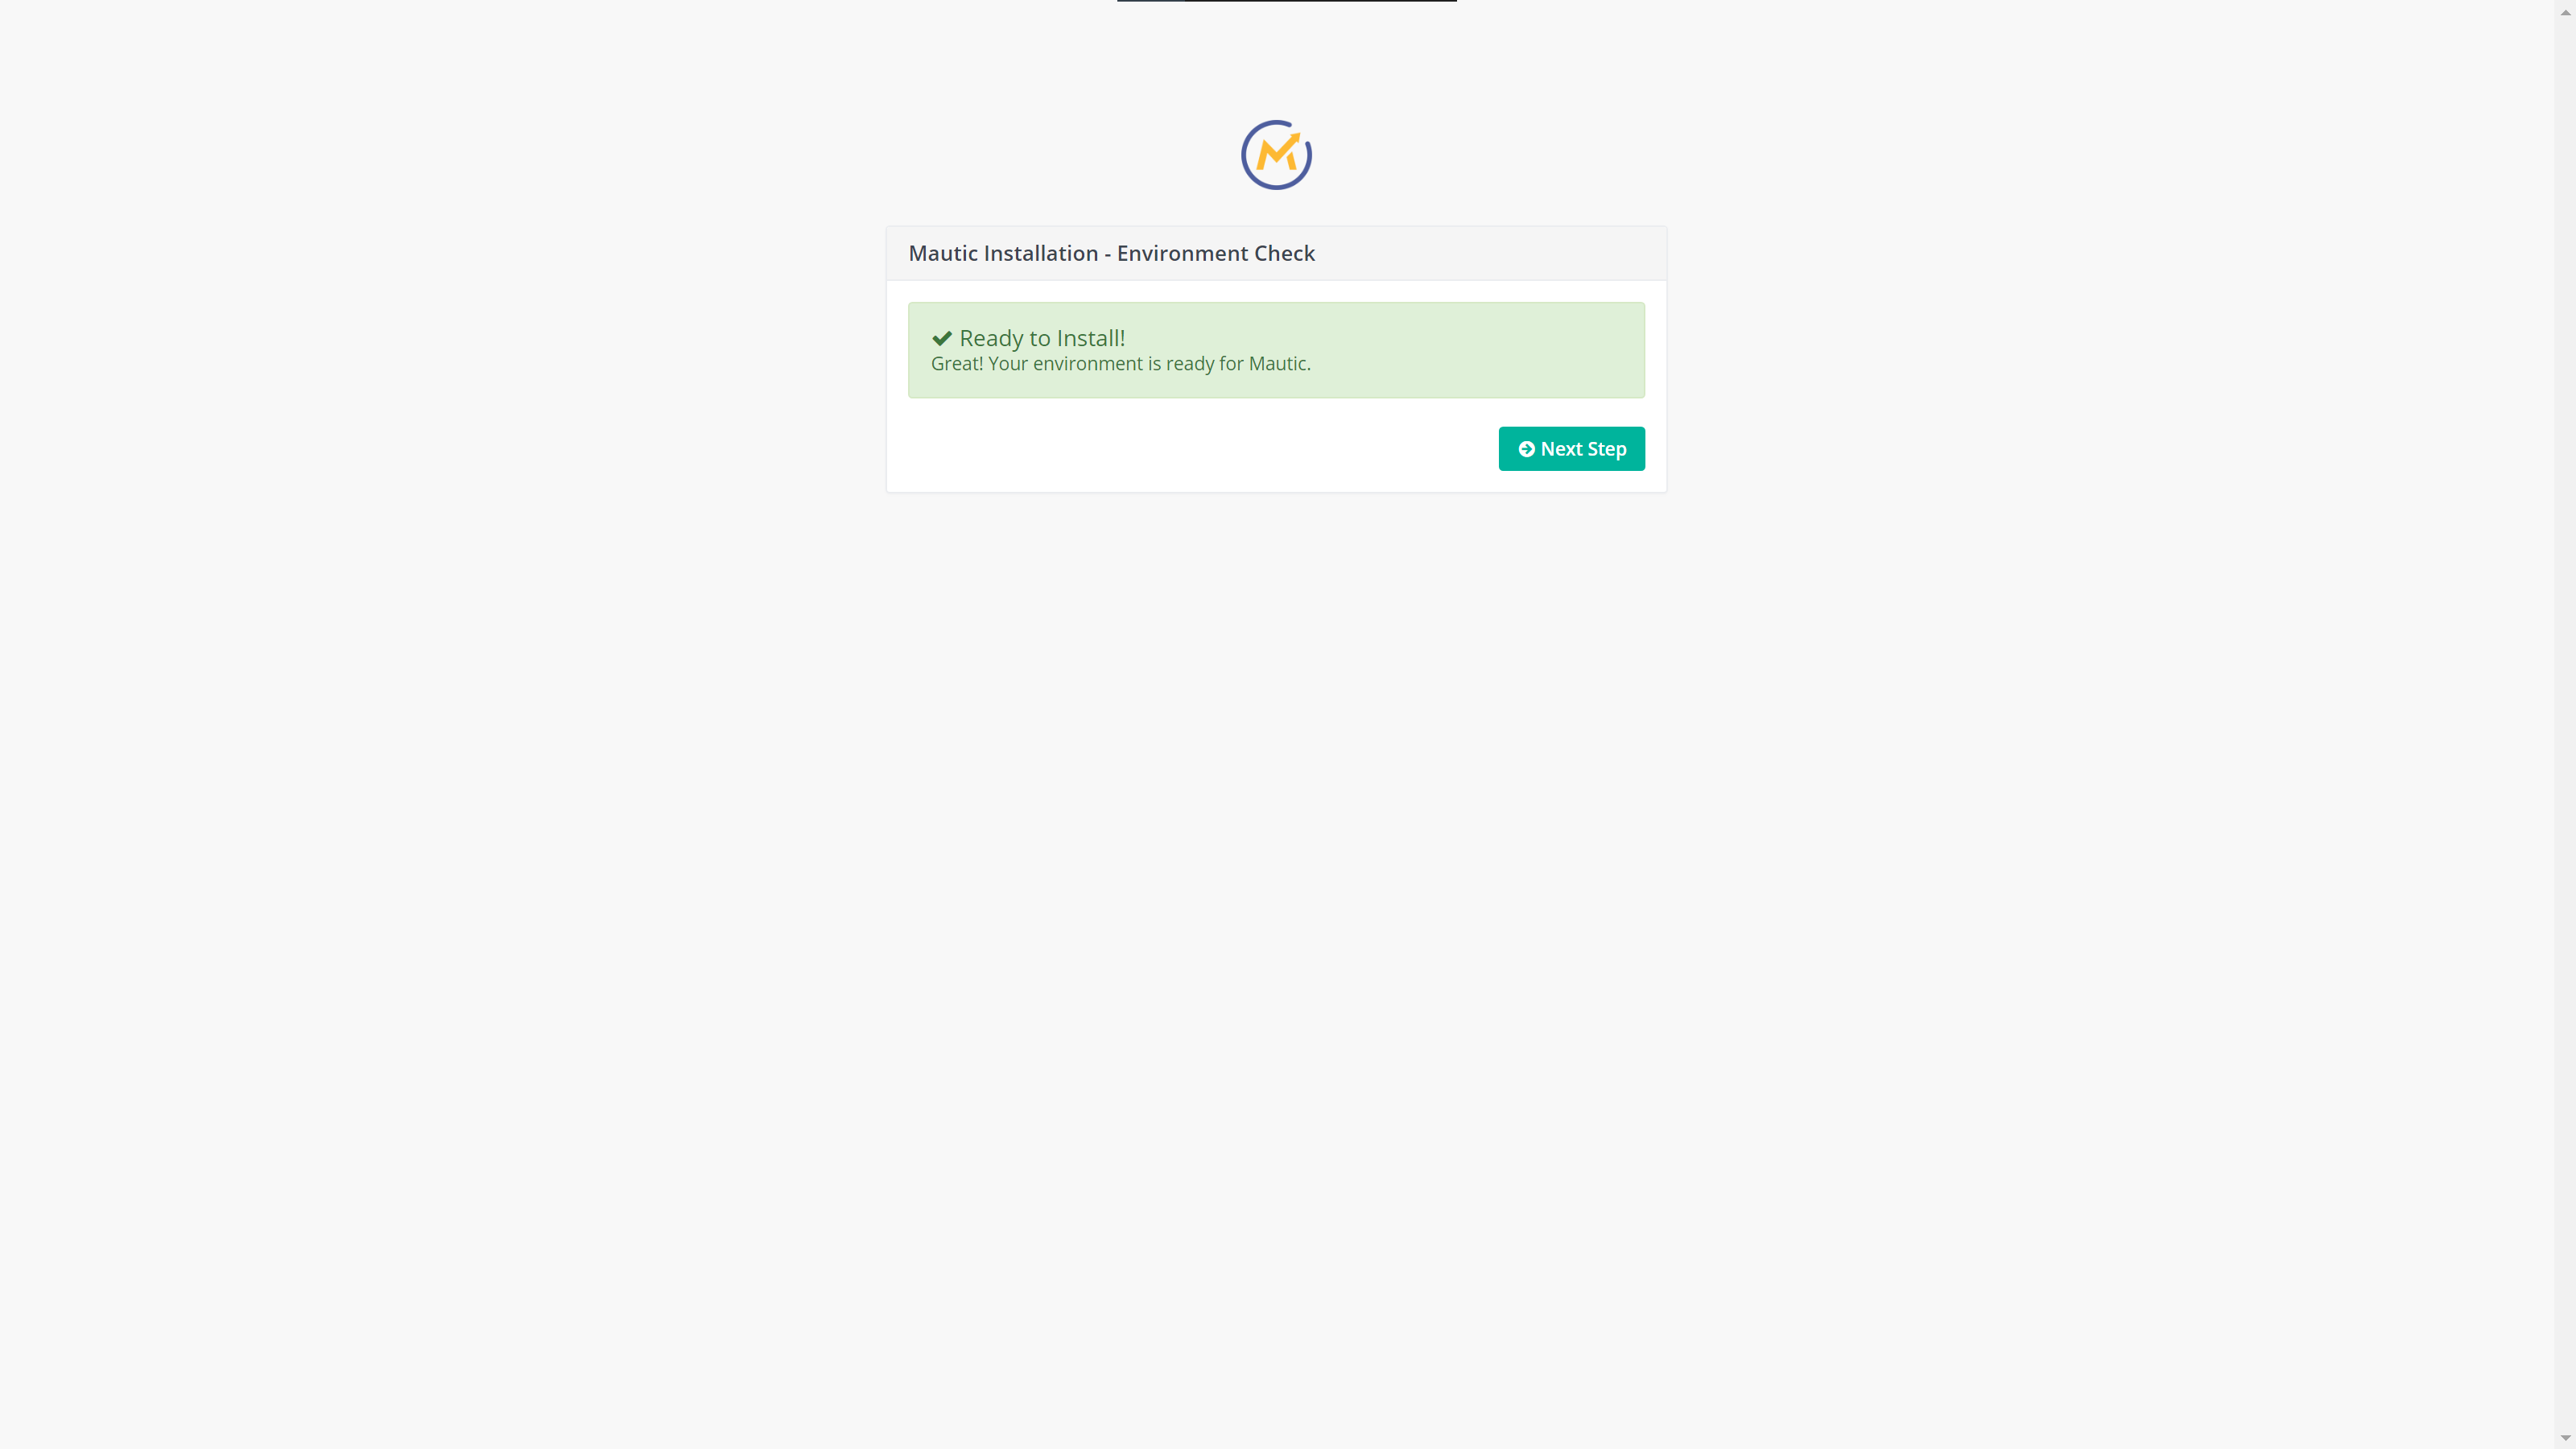
With this complete, you can terminate your terminal session and navigate to https://mautic.yourdomain.com in your browser. If you followed all the steps from the previous article, you should be presented with the following screen, informing you that your server is all set up for installing Mautic.
Mautic ready to install
Installing Mautic
In order to install Mautic, you will be guided through 3 simple steps:
Configure database connection
Create administrator user
Configure email transport
So let’s jump right into it.
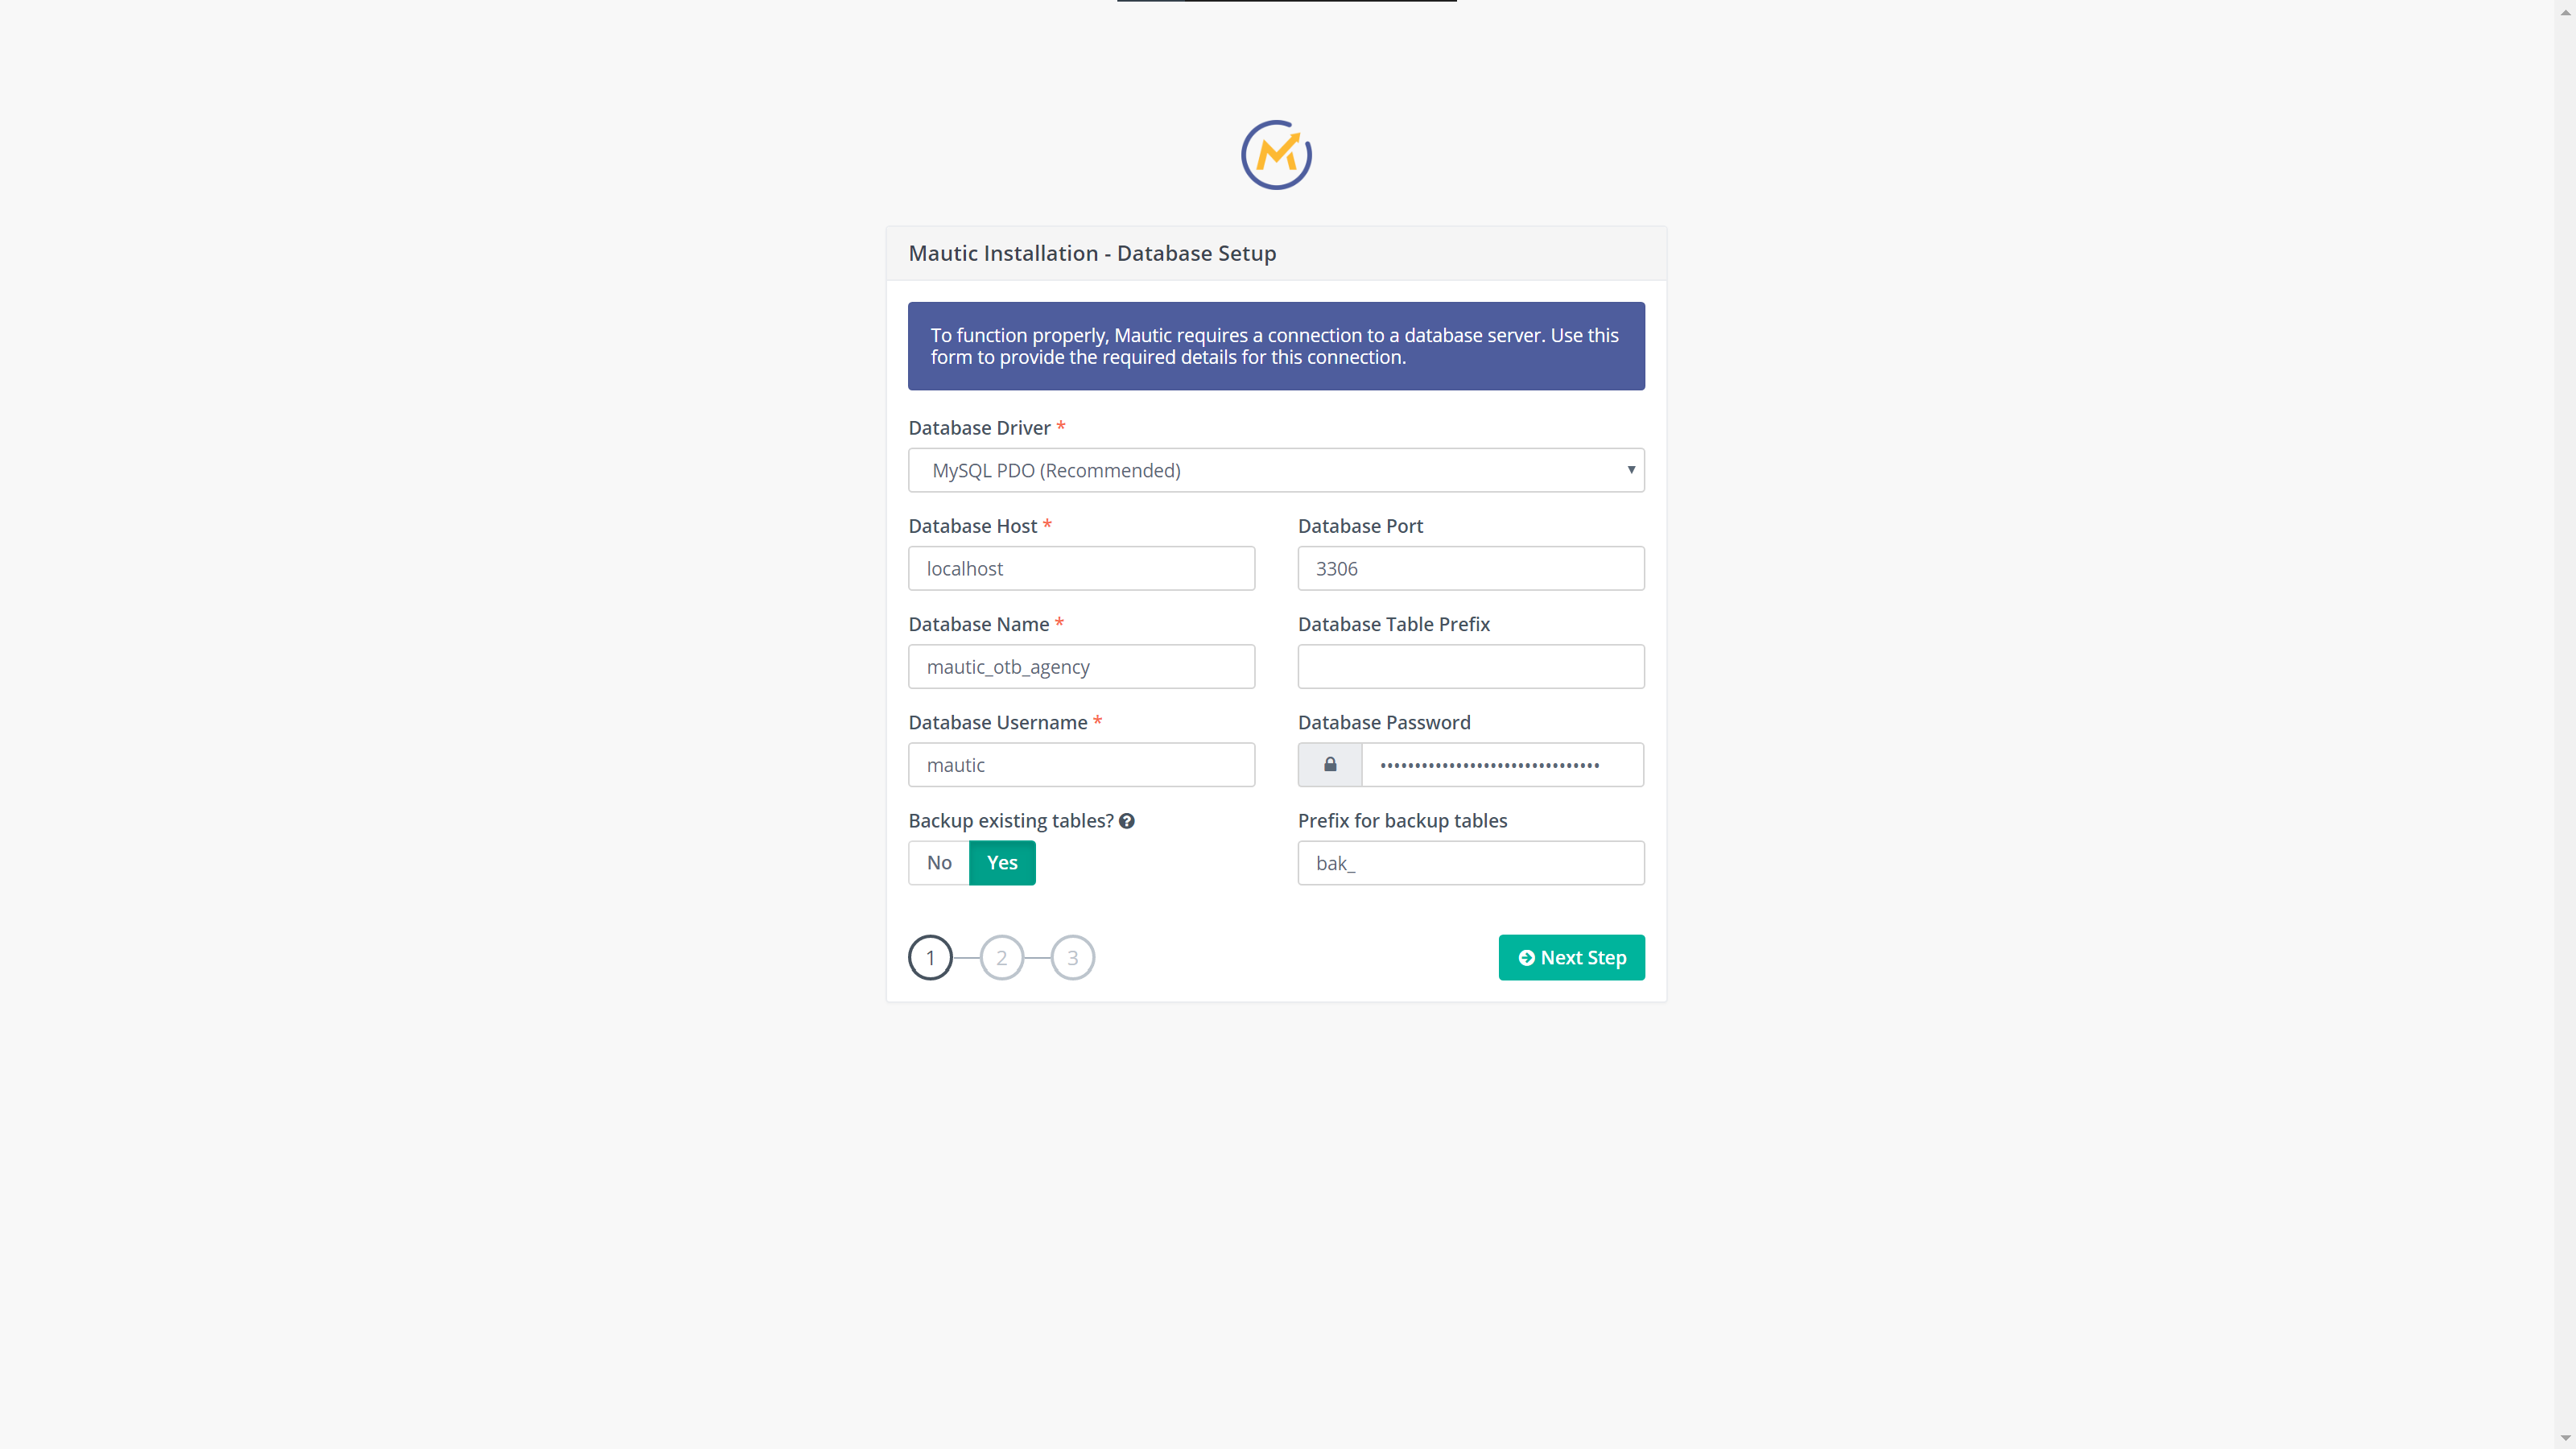
Database information
On the first screen, the installer will ask you for the database name, user and password. If you remember, that information we have from our previous post. Fill in the data required and proceed to the next step.
Database information
Admin user
The following screen will ask you to enter the information for the admin user. This will be the first user in the system, however, in Mautic you can create as many users as you need, with different roles and permissions level. In most cases, if you are a small business, you will likely need only one user with all privileges. Like with any passwords, try to make it strong and unique. For this, I suggest again, use strongpasswordgenerator.com to create a random password and keep it somewhere safe.
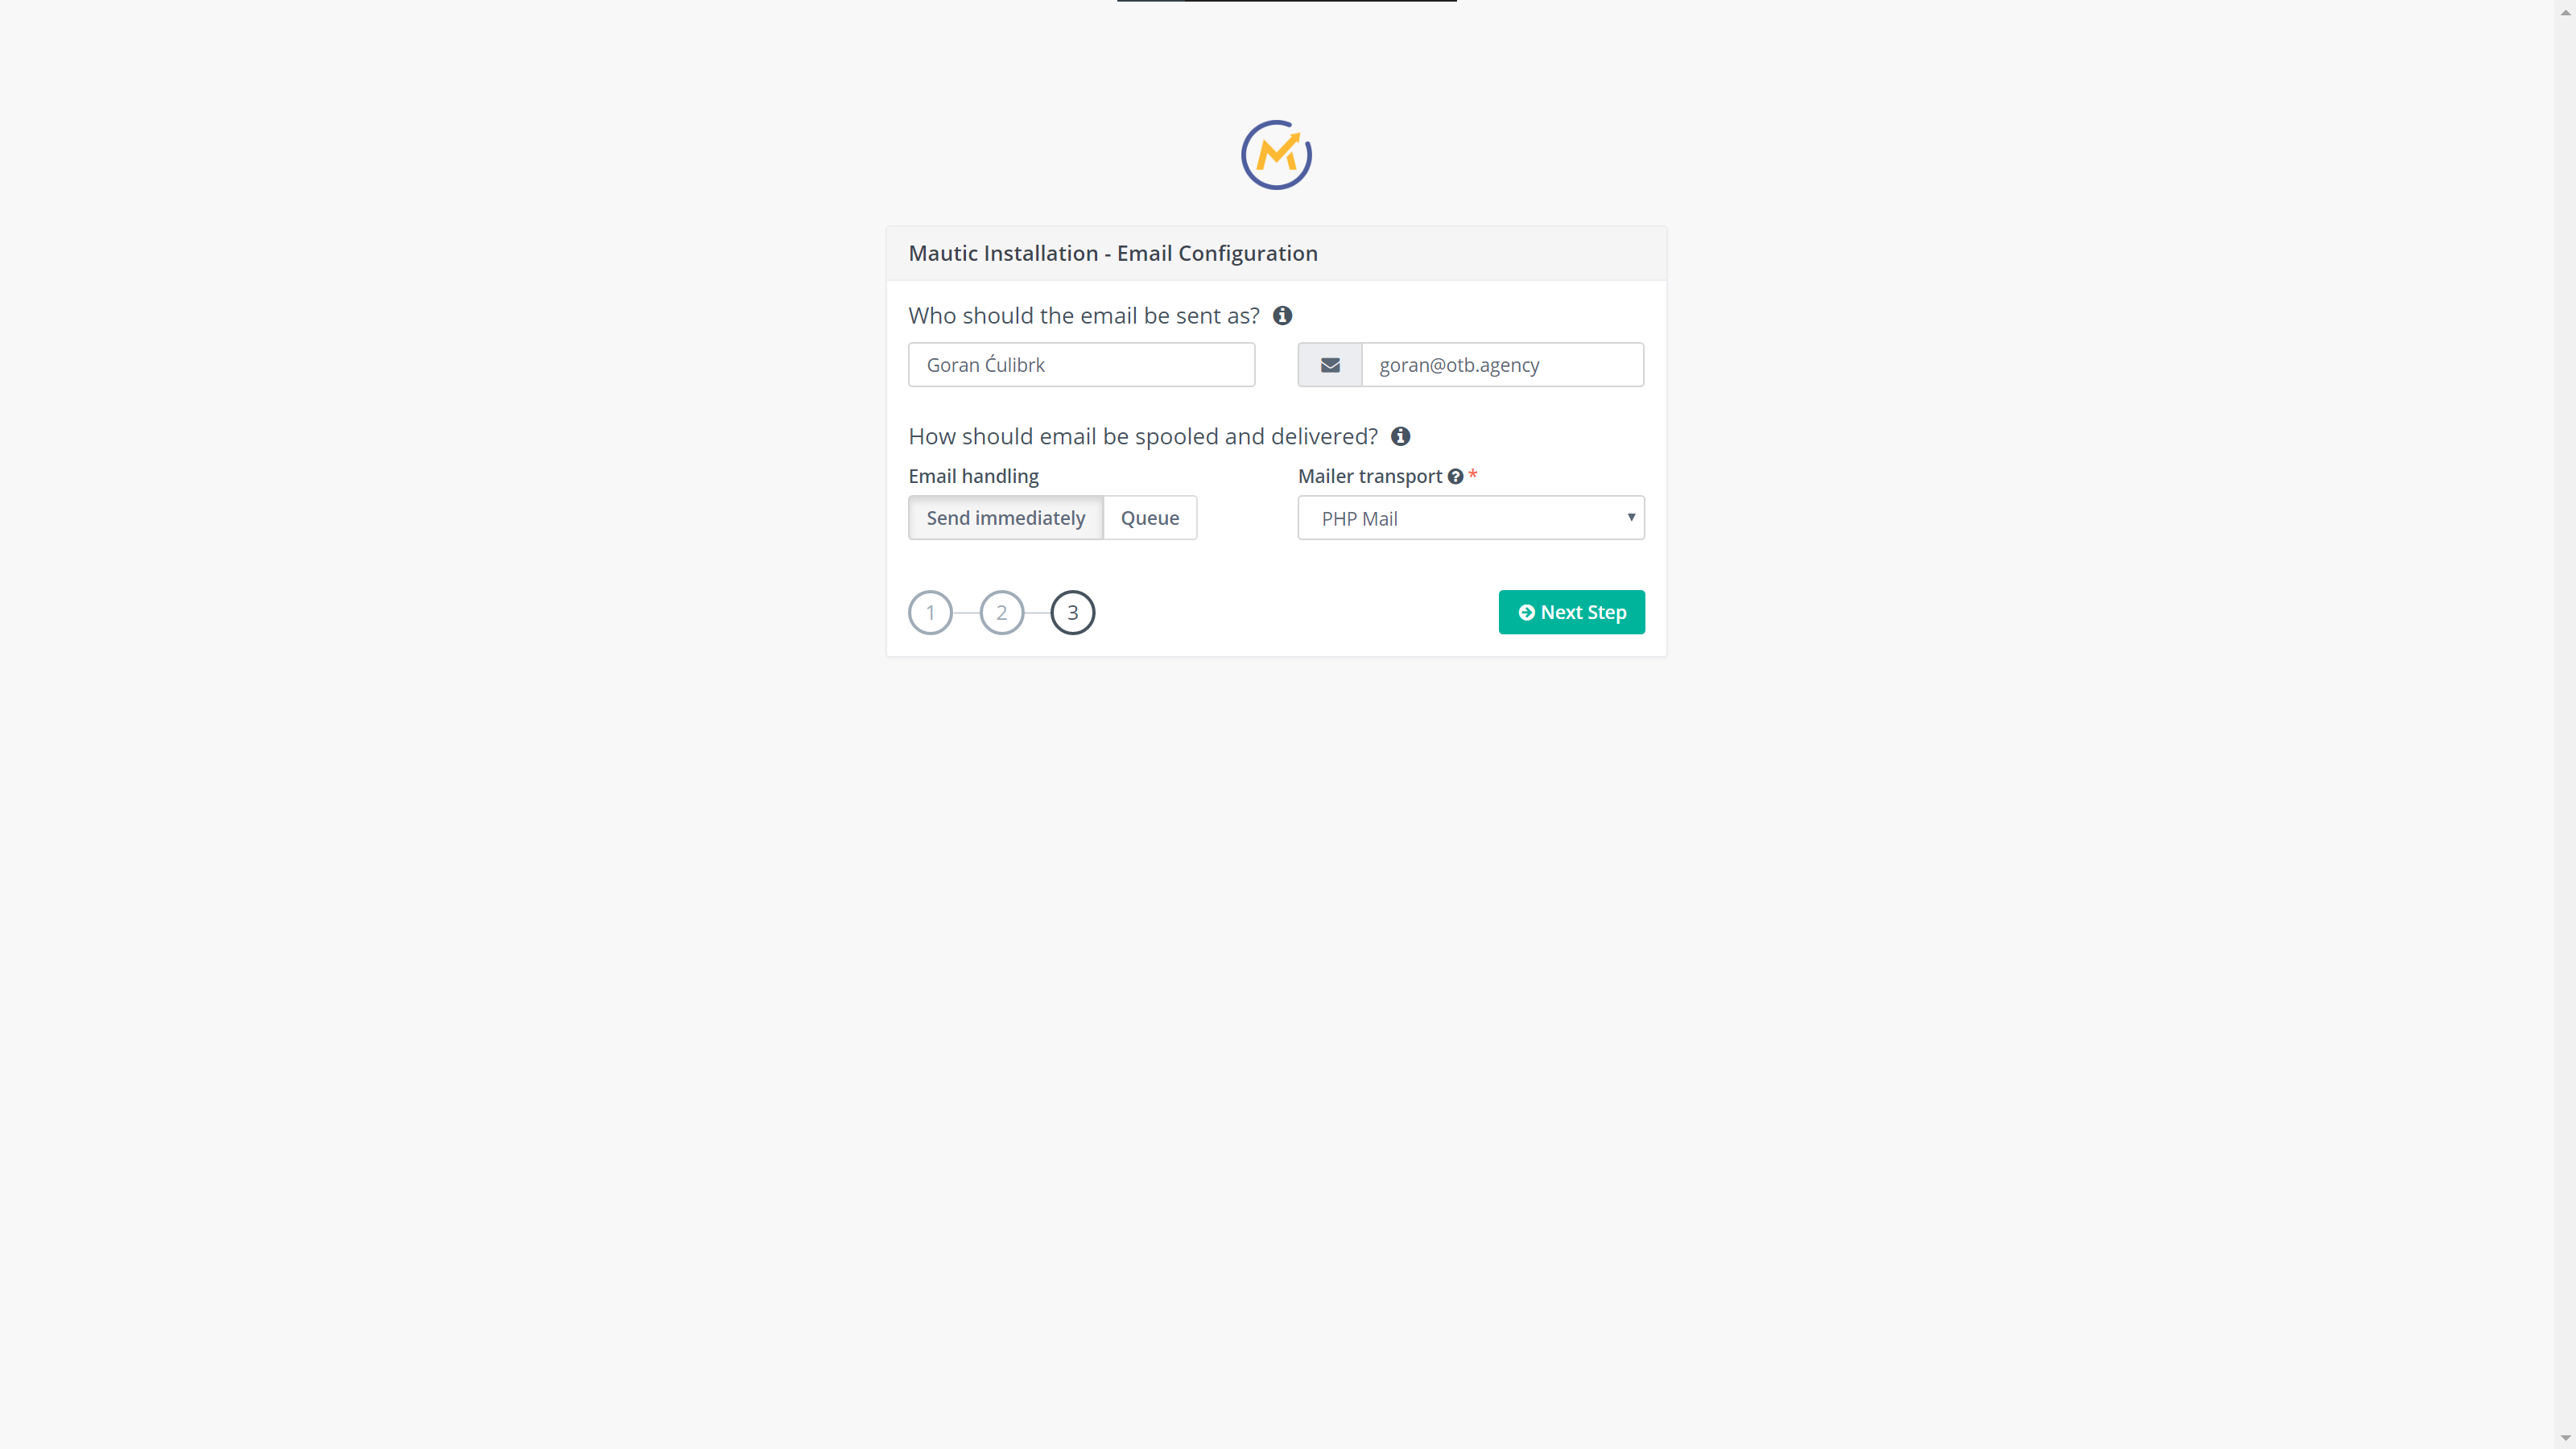
Email configuration
The final step in the installation is configuring the email transport system. Since we are going to use Amazon Simple Email System, we can forward with default configuration since I will cover complete configuration in the next article.
Email configuration
Congratulations
At this stage, your Mautic installation is now complete and you are presented with login screen.
Mautic login screen
And if you login with the credentials you created in Step 2 of the installer, you will be presented with the Mautic dashboard. The one you should be seeing a lot in the future 🙂
Mautic dashboard
That’s all folks. I’ll see you in the next article where we will cover configuring Mautic to send emails via Amazon Simple Email Service, as well as managing bounces and complaints via Amazon Simple Notification Service.
In recent years, Mautic became one of the most promising players in the marketing automation industry. Their approach to open marketing and active community makes them unique by offering powerful tools to your disposal, without setting a price tag. Of course, you can pay for their service and additional tools that will help you manage your marketing activities at scale. The open-source nature of Mautic, allows you to use it on your servers, without additional costs. However, one of the things you need to take care by yourself is Mautic installation.
All you need to get started with Mautic is one server, preferably dedicated or VPS and a couple of hours for proper configuration.
This post will be a part of a series where I will try to explain to you how to set up and run your Mautic instance. The first part will cover preparing and configuration of the server, as well as the installation process. So let’s jump in.
To run a Mautic, you can use whatever the server stack you want, as long as it has the ability to run PHP applications and have the MySQL database server. For full requirements, you can check their website for specific versions.
In this series, I will use the following stack:
Fresh Ubuntu 18.04 server
LEMP stack (PHP 7.2, Nginx, MariaDB 10.4)
For queue management, I will use the RabbitMQ management system
I’ll assume that you are using a fresh install of Ubuntu 18.04 Server.
At the end of these series, you will have a complete marketing automation tool with only costs being charges for your server.
Preparing server
Before installing Mautic, we first need to install our web server and database.
SSH to your server and get the latest updates
sudo apt update
sudo apt upgrade -y
After the process is complete install the nginx server:
sudo apt install nginx
Next, we are installing PHP 7.2 (as of the moment of writing this article, Mautic still requirements are limited to max PHP 7.2). Alongside PHP we will install all required extensions as well. The default PHP version in Ubuntu 18.04 is 7.2 so installation is a piece of cake.
MariaDB 10.4 comes with new authentication system so you can log in to database by using a command
sudo mysql
We are gonna create a database:
create database mautic;
Next, we will create a user:
create user ‘mautic’@’localhost’ identified by ‘StrongPassword’;
When creating a new user, I suggest that you create a strong password, you can use strongpasswordgenerator.com. However, remember that password since you will need it during Mautic installation.
We will allow all permissions on the database to the created user:
grant all permissions on ‘mautic’.*  to ‘mautic’@’localhost’;
flush privileges;
EXIT;
Congratulations, you have completed database configuration. We have three more steps to complete before installing the Mautic.
Nginx configuration
First, big shoutout to Matthew Macdonald-Wallace who created gists with for nginx and PHP-FPM configurations. I’ve modified them a bit for the needs of this tutorial.
Note: In the tutorial, I will use the domain name mautic.yourdomain.com. In order to make it work, replace this domain with your domain name in all the following files.
Create a new nginx configuration file by running the command:
We are getting closer to finishing the configuration of our server. What we have remaining is configuring the PHP-FPM and the last step will be adding the LetsEncrtypt SSL certificate to our Mautic installation.
Let’s create a new PHP-FPM pool for our instance.
sudo nano /etc/php/7.2/fpm/pool.d/mautic.conf
Copy and paste the following lines to the newly created file. And again, don’t forget to update the domain name. Also, don’t forget to update the timezone to the location of your server.
[mautic]
user = www-data
group = www-data
; Match the listen directive to the one from your nginx configuration
listen = 127.0.0.1:9002
pm = dynamic
pm.max_children = 5
pm.start_servers = 1
pm.min_spare_servers = 1
pm.max_spare_servers = 2
slowlog = /var/www/mautic.yourdomain.com/logs/mautic-slow.log
php_admin_value[error_log] = /var/www/mautic.yourdomain.com/mautic-error.log
php_admin_value[open_basedir] = /var/www/mautic.yourdomain.com/htdocs
php_admin_value[upload_tmp_dir] = /var/www/mautic.yourdomain.com/htdocs/tmp
php_admin_flag[log_errors] = on
; Change the timezone to match your servers timezone
php_admin_value[date.timezone] = Europe/Amsterdam
Let’s restart the PHP-FPM service
sudo service php7.2-fpm restart
With our nginx and php-fpm configuration complete, let’s secure our instance by adding SSL certificate. Before we proceed with the final step, make sure that you update your domain settings to point to your server. If you are using mautic.yourdomain.com to host your instance, then you must create A record for mautic.yourdomain.com that will point to the IP address of your server.
Note: If you are using Cloudflare to manage your DNS settings, you must disable CF Proxy and expose your server’s IP address in order to generate the LetsEncrypt SSL certificate.
Assuming that you created DNS records, now it’s time for the configuration of your webserver. We will enable Ubuntu’s firewall ufw and allow only SSH, HTTP and HTTPS protocols on it.
sudo ufw status

Status: active

To                         Action      From
--                         ------      ----
OpenSSH                    ALLOW       Anywhere
Nginx Full                 ALLOW       Anywhere
OpenSSH (v6)               ALLOW       Anywhere (v6)
Nginx Full (v6)            ALLOW       Anywhere (v6)
If you get the status like the output above, you may proceed with the installation of Certbot which we will use to generate and renew the SSL certificate.
Saving debug log to /var/log/letsencrypt/letsencrypt.log
Plugins selected: Authenticator nginx, Installer nginx
Obtaining a new certificate
Performing the following challenges:
http-01 challenge for mautic.yourdomain.com
Waiting for verification...
Cleaning up challenges
Deploying Certificate to VirtualHost /etc/nginx/sites-enabled/mautic.yourdomain.com.conf
Redirecting all traffic on port 80 to ssl in /etc/nginx/sites-enabled/mautic.yourdomain.com.conf

- - - - - - - - - - - - - - - - - - - - - - - - - - - - - - - - - - - - - - - -
Congratulations! You have successfully enabled https://mautic.yourdomain.com

You should test your configuration at:
https://www.ssllabs.com/ssltest/analyze.html?d=mautic.yourdomain.com
- - - - - - - - - - - - - - - - - - - - - - - - - - - - - - - - - - - - - - - -

IMPORTANT NOTES:
 - Congratulations! Your certificate and chain have been saved at:
   /etc/letsencrypt/live/mautic.yourdomain.com/fullchain.pem
   Your key file has been saved at:
   /etc/letsencrypt/live/mautic.yourdomain.com/privkey.pem
   Your cert will expire on 2020-01-30. To obtain a new or tweaked
   version of this certificate in the future, simply run certbot again
   with the "certonly" option. To non-interactively renew *all* of
   your certificates, run "certbot renew"
 - If you like Certbot, please consider supporting our work by:

   Donating to ISRG / Let's Encrypt:   https://letsencrypt.org/donate
   Donating to EFF:                    https://eff.org/donate-le
If you receive the output like the one below, congratulations! You have successfully configured your web server and you are ready to proceed to the next step, installation of Mautic which I will cover in the next article. Thanks for reading. If you have any questions feel free to reach out to me via the comments section below or shoot me an email at [email protected]
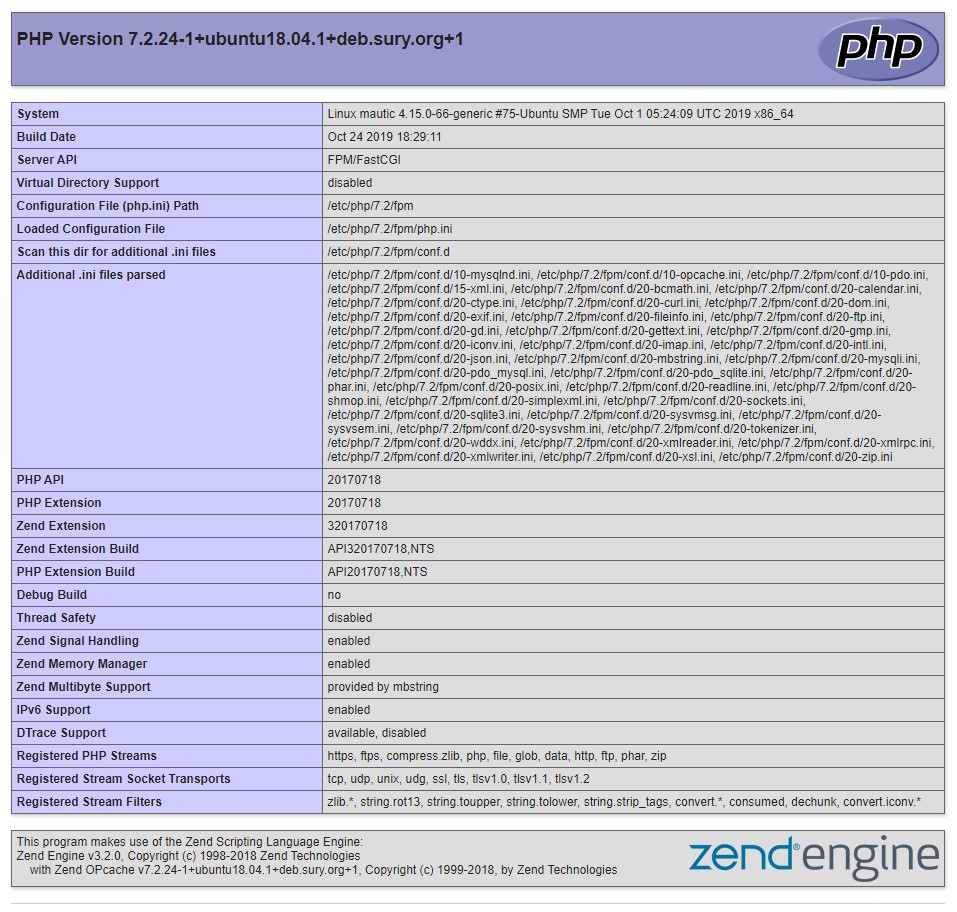
And in case you want to go for the extra mile, you can test the configuration by creating a php info file and opening it in your browser.
Now, when you open up the website on https://mautic.yourdomain.com you should see the following page:
PHP Info output
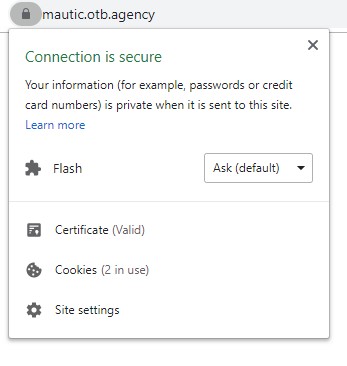
And also, by clicking on the padlock on the left side of the URL in the address bar, you should see the message Connection is secure which confirms that your SSL Certificate is valid and properly installed.